Fotophire Editing Toolkit
Your Complete Photo Editing Toolkit
There are default solutions available in the Windows system to edit images. Make use of the convenient platform and try to explore how to edit pictures on Windows system. It varies with the windows version. You might get used to the process once you start to work on the editing platform. In this article, Let us make a detailed research on how to edit pictures on Windows and learn feasible ways to edit the pictures optimally using the default tool available in the Windows system.
This is an online background changer for PC users, especially for beginners who do not equip with any professional graphic design skills. You are allowed to easily drag or drop every single element to make your design much more stunning.
Step 1: Go to the official home page of the PixStudio and click on “Start Design Now”.

Step 2: Choose the target design you would like to have. After you’ve uploaded the image, try to click “Remove Now” to remove the background.

Step 3: Click to “Background” on the left and you can change the background color or massive exquisite background at your will. Also, you can add the effect that you favorite.
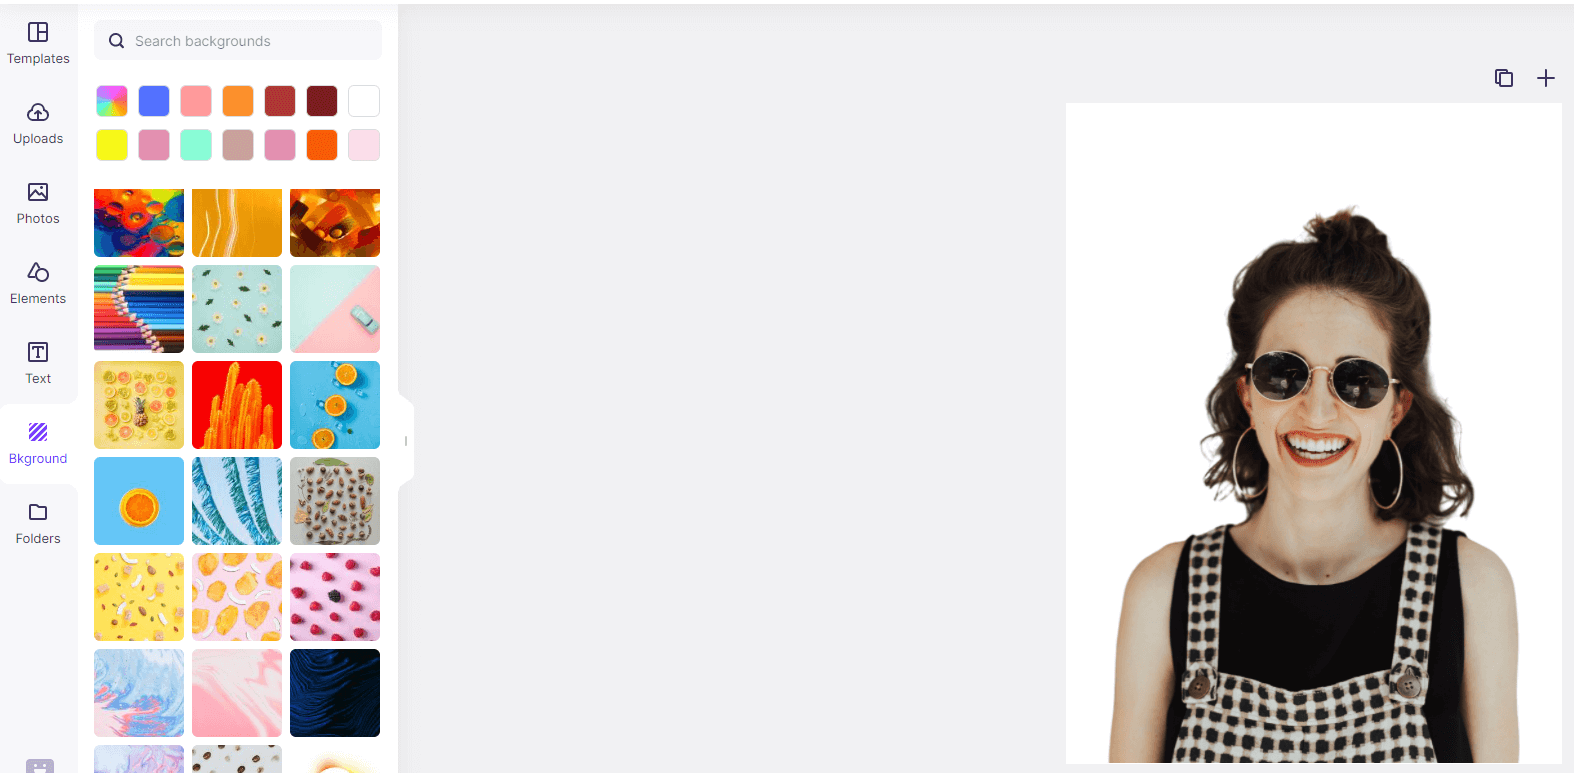

Step 4: You can download the photo for free and get the resulting image.

Look for a tool to edit pictures on Windows 7 computer without downloading any editing software? If you make a hunt in the Windows 7 computer , you will end up with the Paint app. This tool is a default program in this Windows system and you will find ease working in this editor. Go ahead to catch up with detailed facts related to working on Paint.
Step 1: Go to Start -> All programs -> Accessories -> Paint to identify the tool. Click the icon to launch the editor.

Step 2:You can either draw a picture using the drawing tools available at the top in the tool bar ,or you can also import images from the local drive using "Paste from" option at the top left side of the screen.

Step 3: Load the desired image on the editor area to begin the editing process.

Step 4: You can work with the colors and tools like brush, fill in, pencil, eraser etc. Make use of the definite built-in shapes to include any changes in the image. Carry out basic cropping activity using the crop option.

Step 5: Rotate the images and resize it with the help of "Zoom in" and "Zoom out" options displayed at the right bottom of the screen.

Step 6: You can also add gridlines on the image to enhance the view. This option is listed in the ‘View’ menu. You have to check in the ‘Gridlines’ option.

Find out innovative ways to deal with the editing pictures on Windows 7 computer. Scrutinize the strategy which can be adopted while working on the editor in order to end up with desired images.
Make use of the Paint program to edit images on Windows 8 Computer. Though it appears very simple but you can carry out wide range of editing operation in the "Paint" platform of Windows 8. Detailed notes on Windows 8 Paint app has been discussed below.
Step 1: Open the "Paint" app and press the icon to begin our editing process.

Step 2: The "Paint" app editor window displays on the desktop.

Step 3: Import the image from your local drive and utilize the layout and color features to bring an incredible changes in the image.

Step 4: Tap the "Adjustment" menu to alter the details in the image in an effective manner.Modify the curves, brightness etc and play with the tools available at the left side of the screen. It is a convenient platform and you will not encounter any issues while working on this tool. The controls are explicitly displayed and the users can activate the controls just by few clicks.

In general, if you want to utilize the app optimally then you have to learn about the tips and tricks. Have a look at the below tips and improve the quality of the image during the editing process.
For the upgraded version of Windows 10 the Paint app has been implemented with a different skin.
Step 1: Trigger the "Paint" icon to have fun with pictures.

Step 2: Paste the picture to be edited in the image area and make use of the tools available at the top of the screen.

Step 3: You can also add stickers and create a casual image to post in your social media.

Step 4: An amazing entertaining tool for kids. The creativity of the young minds can make wonders with this app.

Get some awareness about the optimum utilization of the app and update your knowledge in the field of photo editing. Travel along with the technical advancements which occur every minute in this photo editing filed. Stay tuned with the latest strategies to create a high quality images.
In the Windows Vista computer you can easily edit the image using the Paint app. The entire Windows platform supports MS paint and it is the default paint program.
Step 1: Tap the "Paint" icon and trigger the image editing area. Download the picture to be edited from the drive and get ready to bang with colors and layouts on the image.

Step 2: Change the color, saturation level, hue etc. You can also resize the image by varying the horizontal and vertical size parameters. Slice the images with the help of crop option. Then save the edited images in your drive and you can make use of it in future without any regrets.

Though, the default MS paint programs in the Windows platform may not be able to bring about a great impact on the images but still you can try out basic editing process without downloading any software from internet. This Paint app satisfies the basic editing needs. Learn about the tips and tricks to work on this platform effectively.
Despite of the built-in Paint app in the windows platform , if you need some unique changes in the image then you have to rely on the third-party solution to edit pictures. Identifying the best photo editor app suitable for the windows version seems to be the challenging task. The Fotophire Editing Toolkit from Wondershare provides you with a simple environment to work on the images more effectively on Windows. Step into the official website https://photo.wondershare.com/photo-editing-toolkit.html to learn more about this unique tool. Initially go with the trial version before making an official purchase of this tool.
5 Key Features:
Take an informative tour on this tool. The knack of editing images will be fulfilled by installing this tool in your PC. Just surf through the below steps for better understanding about its unique tools
Stpe 1: Tap the Wondershare Fotophire Editing Toolkit icon soon after the installation process and open the desired image to be edited.

Step 2: Try out different editing option in this platform. Click the "Adjustment" tab and select the "Vignetting" feature to view distinct phase of the image.

Step 3: Now, apply "Creative blur" by selecting the circular blur tool to focus a particular area in the image.

Step 4: Finally, frame your master piece with stylish collections.

We are here to conclude our discussion. The performance of the Ms Paint on various windows platform has been discussed. Moreover, You can achieve innovative modification in the image using a benchmark photo editing tool Wondershare Fotophire Editing Toolkit. Feed your creative minds with this awesome photo editing platform and design breathtaking images quickly. Fulfil your knack for photo editing using Wondershare Fotophire Editing Toolkit.