Fotophire Editing Toolkit
Your Complete Photo Editing Toolkit
Often people are not well versed with how to change photo background, and look for an effective photo editor. If you are also wondering ‘how to change background of my photo?’, then you have come to the right place. There are various top notch photo editors out there. Here, in this article we are going to explain you in detail about the most sought after photo editors that can help you edit the background of your pictures flawlessly.
If you are looking for a simple and powerful photo editing program, and master how to change photo background easily then Wondershare Fotophire Editing Toolkit is undoubtedly the best tool for you. The process is as simple as 1 2 3. No need of being a professional photo editor, with Fotophire you can work wonders with your editing skills and change background of pictures without any hassle. The process needs few steps to use this photo editor for background change.
No matter how poor your photo has been captured, Fotophire from Wondershare is ultimately going to make it super awesome. It can add that extra spark to your pictures, even if you have clicked them in poor light conditions. Balancing the saturation, cropping the image, or adding frames, filters, and other creative effects such as vigenettes, or changing the background of your picture, Fotophire never shy away from achieving the best results in photo editing.
With features like ‘Straight Line’ you can automatically straighten a picture by drawing a line, and also enhance the texture by using overlays such as bokeh, double exposure, etc. to add the extra effect to your pictures. You can easily save presets with the frequently used settings and apply whenever you need them. Apart from that you can darken or lighten the tones in your picture in a curved manner with the help of the tone curve.
Key Features of Fotophire Editing Toolkit
Though, Fotophire comes with a wide range of features to meet your photo editing needs, it's photo cutter feature is class apart. It removes the background in few clicks and transforms your image with a brand new background. By the end of the tutorial, you will learn to ‘change background of my photo and trim the picture and preserve only the foreground'. First you need to import the pictures, remove the background from the primary picture, create a photomontage, change the tilt or crop the image, and finally export, share or print the edited image. This step-by-step guide will explain the entire process in detail.
From the official website of Wondershare Fotophire download and install the Fotophire software by clicking this link https://photo.wondershare.com. Once the software is installed on your computer, launch it to and select the editing mode as ‘Photo Cutter’ to start changing the background of the picture.

Now, from the next upcoming screen, click ‘Open’ to select the picture rom your computer. You can even tap the ‘Recent Files’ tab to use any recently edited file here.

Once you are done choosing the desired picture, click on the red color marker that says ‘Paint Areas to Remove’ tool under the ‘CUT-OUT’ section found on the right panel of the screen.

Using the ‘Paint Areas to Remove’ tool, draw a line in the background to highlight the background. It will automatically pick the remaining portion of the background that you desire to remove. If any of the portions in the background is not selected, you can repeat the highlight process and get the job done.

Note: If accidentally you marked the areas of the picture you don’t wish to delete, then use the ‘Erase Painting’ marker in order to remove the highlighted lines.

Now that you have secured the foreground picture, let’s select a background image. Tap on the ‘Photo Montage’ tab below the ‘CUT-OUT’ section. You can select the background from the list or click the ‘+’ sign to import a desired image from the computer. You can rotate, flip, or resize the image as you require.

Tap on the ‘CROP’ tab from the top part of the right panel and then slide the ‘Angle’ bar to adjust the tilt and tap the ‘Crop’ button to confirm. You can use the ‘Straighten’ tool to automatically straighten the image.

Once the editing is done, you need to save the picture in JPG, PNG, or TIFF format by tapping the ‘Save’ icon. Make sure that the foreground picture ought to be saved as a PNG file only. You can also Print or Share it on Facebook as per your wish.
Photoshot is one of the most popular photo editing software applications that allows you to do a lot with images, it also acts as a photo editor for background change. Using this tool you can do detailed editing like selecting areas such as hair, as well as match colors between multiple images. Though, Photoshop is not quick to adapt by a beginner, as it requires a lot of practice to master the tools.
If you are wondering how to change background in Photoshop, then there are multiple ways to do so. You can either make a selection to separate the background from the foreground using the ‘Quick Selection’ tool or the ‘Pen’ tool, though the ‘Quick Selection’ is a bit advance to understand and work with.
Here, we have taken Photoshop with a Windows system. The guide will explain the same. You can also work on your Mac system, but make a note that the settings with keyboard will differ there. Let’s dig deeper into the step-by-step process of this photo editor to learn background change.
After installing and launching the software on your computer, you need to select the picture you want to edit and open it with Photoshop. Now, pick the ‘Quick Selection’ tool by clicking ‘W’ on your keyboard or choosing it from the toolbar. For selecting the desired area click and drag the brush. Depending on the contrast, the software will guess the parts you are selecting and select the hard-edged, high-contrast portions neatly. It is tough to work with low contrast and soft edges. The selection can be inverted by tapping Shift+Control+i in your Windows PC.

You need to fine-tune your selection now, by zooming in to the picture and minimizing the size of the brush you are using. Try to include the solid objects from the picture that you want to use on the foreground by clicking and dragging over them. If you have selected undesired parts by mistake, then hold the ‘Alt’ key down and click and drag the brush to deselect the said portion.

Now, tap the ‘Select and Mask’ from the ‘Options’ bar and go to the ‘Properties Panel’. You need to tap the ‘View Mode’ option to visualize the way the selection will appear. You can go for ‘Overlay’ or can click the ‘F’ key to browse through the views and check the various backgrounds and see if there is anything wrong with your selection.

Pick the ‘Brush’ tool and smooth the edges of the subject by simply painting on the area of the picture, or you can tap the ‘Alt’ key and paint for deselecting the portion. Tap the ‘Refine Edge’ tool and touch up minute details of the subject by selecting the ‘Smart Radius’ option under ‘Edge Detection’. Press the ‘P’ key on your keyboard to switch between the before and after effects.

Now, remove extra color fringes that you have selected, by selecting ‘Decontaminate Colors’ under ‘Output Settings’. Go to ‘Output To’ and select ‘Layer Mask/ New Layer with Layer Mask’ then click ‘OK’. It will add the new selection as a ‘new layer’ and navigate you to the main image.

Select your new background and paste it by placing on a layer right under your selected foreground layer. Position the layer by using the ‘Hand’ tool and use the ‘Free Transform’ tool (Ctrl+T on keyboard) to resize it. Maintain the same aspect ratio by holding the ‘Shift’ key down.

7. Select the image by tapping ‘Image’ Adjustments’ and then ‘Match Color’ to fix the foreground’s color. On the next window, click ‘Source’ and pick the current image, then select the specific ‘Layer’ to be fixed. Remove any color cast by checking ‘Neutralize’ as well as balance the ‘Intensity’ and ‘Luminance’ to blend the background and foreground properly. Tap ‘Preview’ to see the before and after effects.

Now, tap ‘OK’ and save the file in PSD format, so that you can edit it in future. It will save all the layers – original image, background, and foreground.
Mac computer has an inbuilt feature ‘Preview’ that also works as a photo editor, allowing background change. Using this feature the background of an image can be removed or part of an image can be extracted from the entire picture. This default application of the macOS supports file types such as JPG, PDF, and PNG. Though, the feature is basically for quick-viewing different documents easily, it allows various markup and editing options as well.
Using ‘Preview’ tool you can not only view documents and images, but also crop documents, add signatures to them, share them, highlight PDFs, etc. as well. Imagine you have a group photo, so using Preview you can extract one person’s face and stick it somewhere else as you desire. In case the background of an image is almost of the same color, then you can get rid of the background and then use the picture with any other background to create a beautiful effect.
Here is the detailed process to change the background of a photo using the ‘Preview’ feature in Mac computers.
To open the desired image file, hold control and then tap on the file or simply right-click the file. Then hover on ‘Open With’ and click ‘Preview’. Now your picture is open with ‘Preview’, and you can edit it.
Note: To change the background of a picture, you will need the Markup Toolbar. This toolbar allows you to use color adjust, text, sketch, and selection features of ‘Preview’ while editing a picture.

If you can’t see the ‘Markup Toolbar’, then tap on ‘Show Markup Toolbar’ button (a toolbox icon). After that click ‘Instant Alpha’ button to proceed. You can also use the ‘Touch Bar’ as an alternative.

Now, drag the ‘Instant Alpha’ button over the background of the image. This way the background with adjacent pixels having the same color is selected by ‘Preview’ for deletion.

Now, tap ‘Delete’ to remove the selected area from the picture. Please note that in case you want to delete the portion beyond the selected area, go to ‘Edit’ and then ‘Invert Selection’, then tap ‘Delete’.

Continue with step 3 and 4 till you get the desired image output.

Once the image is in your desired form, it’s time to save it. Now, press the ‘Command’ Key along with ‘N’ key on your keyboard to bring up a ‘New Clipboard’. Now drag the isolated image from the old clip board to the new clipboard.

You can merge this isolated object image with a suitable background, for this you need to import a new image file the clipboard. Now, select the image which you wish to make the background of other and then tap on Arrange from the top menu. Lastly, hit on ‘Send to Back’ option. The object you’ve clipped out using Instant Alpha will now appear on the front, drag it to the desired position.

Once you are satisfied with the final look of the image, save the file by tapping the ‘File’ menu from the top-left and then hit on ‘PDF’ option available under the ‘Export to’ section.


Apart from your Mac or Windows computer, there are various apps in the market that work as photo editors for background change in your mobile devices. You can go for top notch photo editing apps for Android and iPhones to meet your photo editing needs. In this part of the article we have featured one Android and one iOS app for your convenience. So, what are you waiting for? Hit the Play Store/App Store according to your device, and then see the magic unfold.
While you wonder ‘how to change background of my photo?’ on your Android phone, this Android app climbs the popularity charts among users. This app can function as a photo editor and collage maker for your Android device with a huge range of effects, tools, free clipart library, drawing tools, user-created stickers, and the built-in camera and add spark to your life. Apart from photo editing and collage making, it helps you create hilarious memes right on your Android phone.
The photo editor feature of this app contains more than 1000 options to help you crop, stretch, create cutouts, add text, adjust curves, clone, etc. along with various HDR and regular filters, background, frames, callouts, borders and the likes. Number of interesting fonts are there to add text to the images and create memes, as well as Prism-styled effects boosted with artificial intelligence make picture editing more fun. Though, the background changing process is bit lengthy and tiring for people.
Step 1. Install PicsArt on your Android phone and launch it.
Step 2. Tap the ‘+’ button found on screen at the centre of the bottom part. Now, you will see a list of options like a banner in the bottom part of the screen. Click on ‘Edit’ and select the desired picture you want to remove background from.
Step 3. From the bottom part of the screen click ‘Tools’ and then tap ‘Selection’ from the second row of options.
Step 4. After that tap the pear-shaped tool on the bottom part of the screen and then click the pear-shape with a ‘+’ sign on it.
Step 5. Now, save the picture and repeat step 2. But instead of selecting a picture tap the ‘Background’ tab.
Step 6. Select a desired background from the list and then swipe the bottom ribbon to left and tap ‘Add Photo’.
Step 7. Now, select the photo whose background you have removed in the previous steps, and then click ‘ADD’ on the top right corner.
Step 8. After that adjust the size of the photo you have added to the background and click the tick mark on the right corner.
Step 9. Now, you will find the option to save it to gallery or share on social media. Tap ‘Gallery’ and save it on your phone.

SuperImpose app assists you in removing the background of any picture using your iPhone within few clicks. Using the ‘Target’ function areas of identical colors can be automatically removed during the editing process. It comes with cut out tools such as - target area auto remove tool, erase/restore (for the area you touch on the picture), reverse tool (reverses the removed area); crop feature that enables you to crop pictures with different preset features, 9 adjust effects tools for managing – smooth, contrast, brightness, exposure, saturation, shadows, highlights, vignette, and temperature of pictures; add background photo – for changing and removing the background of your pictures. You can also share the pictures in social media post background change or any other edits.
The app has major section such as Home, Transform, Mask, and Filter, and it opens with the Home section that allows you to import pictures. You need a background and a foreground picture where the foreground image contains your primary subject.
If you are curious to learn ‘how it changes background of my photo?’, then you need to go through the guide.
Step 1. Install the app on your iPhone from App Store, and launch it. Now, in the home screen tap the ‘Import’ icon in the top left corner to see a poped-up section saying ‘Import Background’ surface on the top part of the screen. Click the ‘Photos’ tab and select a picture as your background from your photo library and then tap ‘Choose’.
Step 2. To choose the foreground image, click ‘Import’ icon again and under the ‘Import Foreground’ section click on ‘Photos’. Resize if desired with the help of ‘Constraints’ option or simply click ‘Choose’ to confirm the selection. On the screen your background image gets superimposed by the foreground image.
Step 3. Click the ‘Transform’ option to resize and reposition the foreground image on the screen. You can pinch-in and pinch-out the image to resize it and drag it anywhere in the screen. You can use the ‘Fit to Background’ feature to scale the foreground according to the background.
Step 4. It is essential to mask the foreground image and make the unwanted parts transparent to make the background image standout. Tap on the ‘Mask’ icon and then the ‘Magic Wand’ or ‘Brush’ tool to do so.
Note: You can use the ‘Smart Brush’ or ‘Lasso’ tool as well, for easily selecting the parts of image and then tap ‘Settings’ to control the tool’s settings.
Step 5. Select the area you want to mask by tapping and dragging your fingers on the foreground image. A red dot shows you the area you are working on. You can tap ‘View Mask’ icon on the top and see the masked area.
Step 6. Now that you have created a mask, it’s time to save it in the ‘Mask Library’, as it can be reused with new backgrounds in future. Click the ‘Home’ option from the bottom of the screen and then tap ‘Save Mask’ and click ‘Save’. Now, the mask has been saved successfully.
Note: ‘The Mask Library’ is found in the ‘Home’. You can click on ‘Load Mask’ and reuse the saved masks.
Step 7. After saving the mask, it’s time to save the final image for which you have used this photo editor app for background change. Click the ‘Export’ icon under the ‘Home’ section and you will see the ‘Export Destination’. Here, select the ‘Photos’ option and save the image. You can also share it directly to ‘Instagram’ or other social media platforms right from here.

In the last part, if you were not planning to do any installation for changing the background of your image, you should better try Wondershare PixStudio. This platform helps you to design simplify by dragging or dropping every element on the canvas.
How to change the background of a photo easily using PixStudio online
Step 1: Go to the official home page of the PixStudio and click on “Start Design Now”.

Step 2: Choose the target design you would like to have. After you’ve uploaded the image, try to click “Remove Now” to remove the background.

Step 3: Click to “Background” on the left and you can change the background color or massive exquisite background at your will. Also, you can add the effect that you favorite.
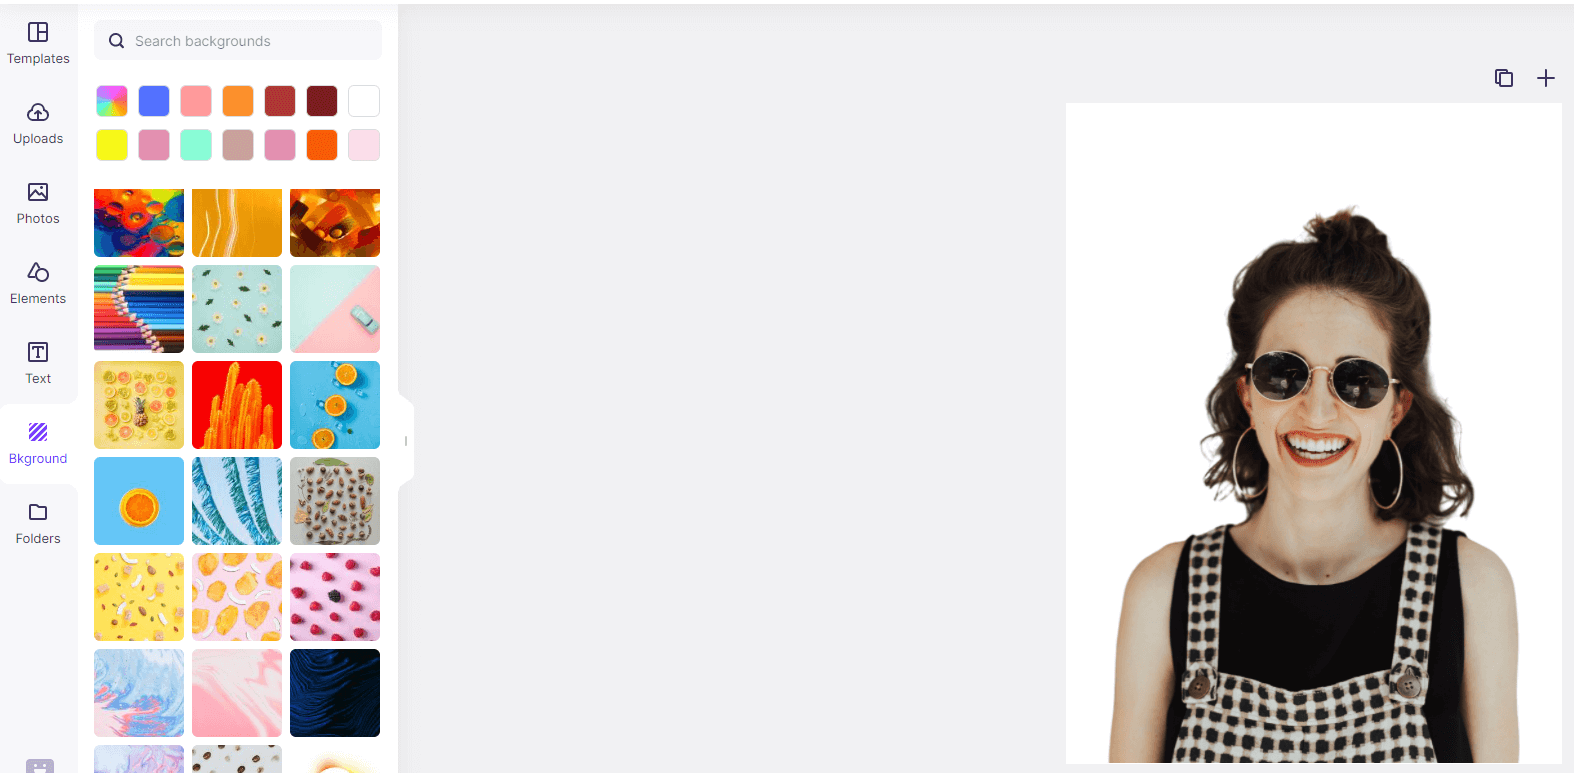

Step 4: You can download the photo for free and get the resulting image.

After going through the article and knowing about all the photo editor applications for background change, we would no doubt vouch for the best solution in every aspect. That is none other than Wondershare Fotophire to change the background of my photo. Talk about the ease of use or the quick to understand simple tools that require no professional knowledge to crisply edit and remove the background of any picture and merge it with a desire new background, Fotophire is a gem of a tool to rely upon. So, what are you waiting for? Get the software and surprise everyone with your awesome editing skills.