Fotophire Editing Toolkit
Your Complete Photo Editing Toolkit
With the availability of a ton of photo editing software, you can have tons of ways to add a new background to your photo. This can be either done in a few simple steps or through a number of advanced procedures. Regardless of the method you choose, you will be able to achieve that output you want for your photo. But of course, the quality of your output will depend on the editing software you use. In this tutorial, we’re going to figure out how you can add background to photo using Fotophire, an online photo editor, and a mobile photo editing app.
Wondershare Fotophire Editing Toolkit is a photo editing software that allows you to edit your pictures, apply effects and filters, and add background to photo. It’s a relatively easy to use tool that comes with a number of features which are as follows:

You can Get Wondershare Fotophire Editing Toolkit for Mac Here.
1st Step: Launch the Fotophire Editing Toolkit then choose Photo Cutter.

2nd Step: Choose the image you want to edit. You can do so by clicking Open then head to where your image is located.

3rd Step: If your photo is in JPEG format, you need to remove the background first before you can add a new one. To do so, navigate to the CUT-OUT section then click Paint Areas to Remove. Adjust the size of the brush accordingly.

If your photo is in PNG format and has the subject already cut out from the background, you may proceed to the 5th step.
4th Step: Using the brush, paint on the areas you want removed. Simply stroke on the edges of your subject, and the tool will take care of the rest. Once you’re done, you should have an output like this:

5th Step: In this step, we’re going to add a background. You can head to Photo Montage under the CUT-OUT section and select from a number of presets available. If you want to add your own image, simply click the “+” icon.

6th Step: Resize your subject or rotate based on your preference. Once you’re satisfied with the results, save your file by clicking the Save icon at the top.

There’s a number of online photo editors out there that lets you add background to photo. In the following, we are going to show you how to add background to a photo with two online photo editor.
Step 1: Go to the official home page of the PixStudio and click on “Start Design Now”.

Step 2: Choose the target design you would like to have. After you’ve uploaded the image, try to click “Remove Now” to remove the background.

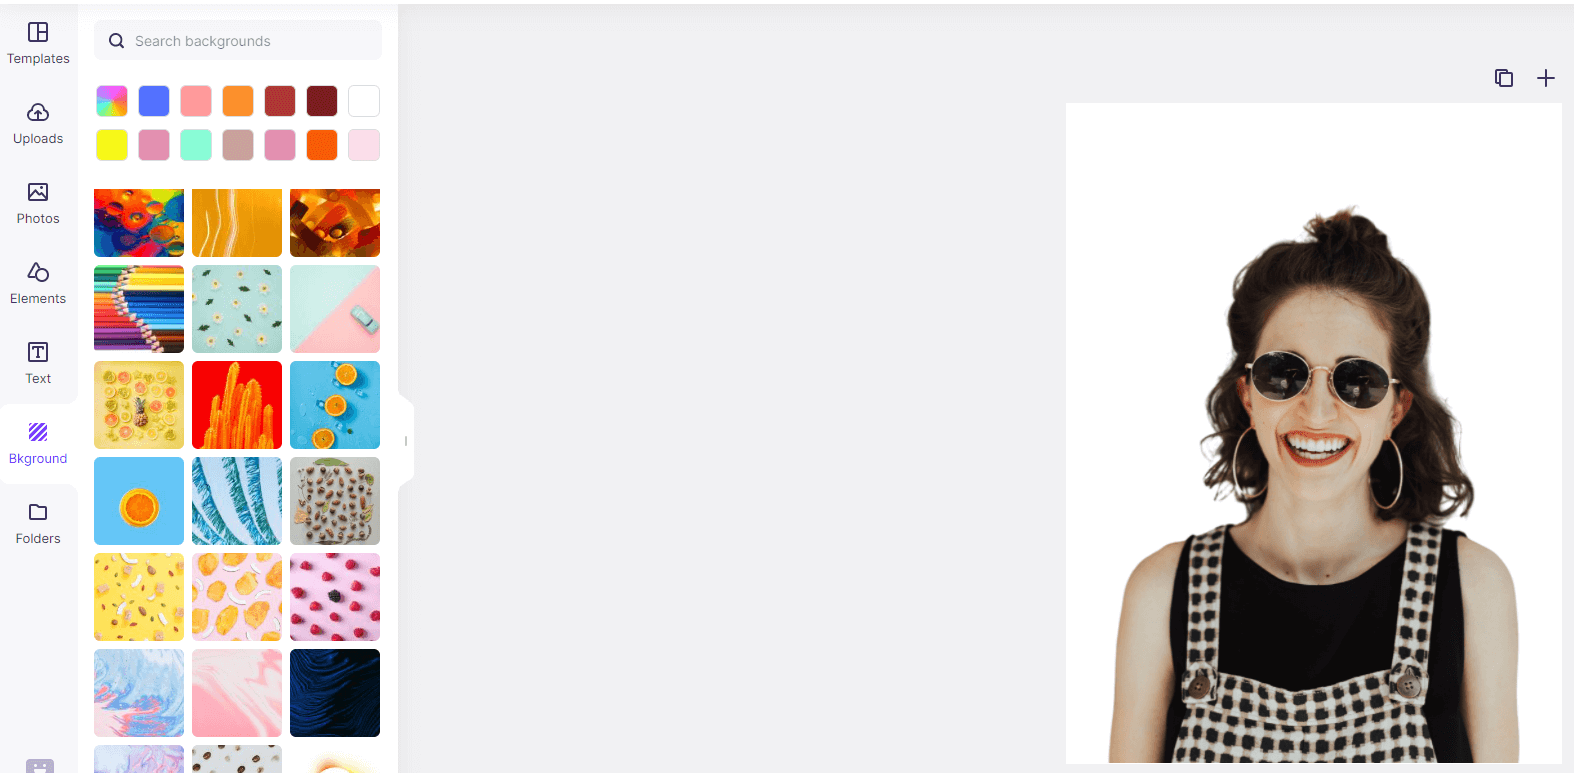
Step 3: Click to “Background” on the left and you can change the background color or massive exquisite background at your will. Also, you can add the effect that you favorite.

Step 4: You can download the photo for free and get the resulting image.

1st Step: Visit PhotoScissors at online.photoscissors.com. Afterward, click the Upload Image icon then locate the image you want to edit.

2nd Step: You can see two panels. The left panel houses your original image, while the right section will display the output. To remove the background, simply click the green “+” icon at the top.

3rd Step: To remove the background, simply paint on your subject with the green brush. You also need to paint the background with red to remove it. You can do so by clicking the red “-“ icon near the green icon at the top. This is how your output should look:

4th Step: After removing the background, click the middle icon on the right panel then choose Image from the drop-down. Click Select Image then locate your background.

5th Step: With the background added, you may then resize, rescale, or rotate your image accordingly to suit your preference. Once you’re done, simply click the Save icon on the top section. This will automatically download the image to your computer.

This is how the final output will look like:

Using your mobile phone to edit your pictures has never been easier than before. Due to the availability of various photo editing apps for mobiles, you can now perform various edits such as adding a background to your photos in a few, easy-to-follow steps. For this tutorial, we’re going to use PicsArt for the Android platform.
1st Step: Launch the app on your Android phone. If you don’t have it installed yet, you can download it from Google Playstore for free. To start, select Photo then navigate to where your image is located.

2nd Step: After opening your image, select Tool on the bottom left corner. A new menu will popup. Choose Free Crop.

3rd Step: Choose the Brush icon then start painting on your subject. Repeat until you covered all parts of your subject. You can use the eraser tool to erase any excess strokes.

Once you’re done, press the Check icon.

4th Step: Save your image by clicking the Save icon on the top portion of your screen. Make sure you save it in PNG format.

5th Step: Go back to Step 1, except that this time, you’re going to open the background image first.

Afterward, slide the bottom panel to the right until you come across the Add Photo option. Select it and when prompted, press Single Photo. Look for your cut out image afterward.
6th Step: Adjust your subject accordingly. You can rescale, resize, or position it anywhere you want. Once you’re done, simply press the Check icon.

7th Step: Save your work afterward by pressing the Save icon. This is what your final output will look like:

You can also modify your final output by using the different filters available. Just try experimenting with the various tools until you can achieve your desired output.
As said earlier, adding a background image to a photo is a really simple task given that you follow the steps mentioned. Based on my own experience, I find the Fotophire Editing Toolkit to offer the most number of customization options and features compared to the rest. It’s also the most stable and intuitive choice. Hence, if you want to add background to photo, don’t hesitate to try the product for free.