Fotophire Editing Toolkit
Your Complete Photo Editing Toolkit
Looking for a way to change the background of your images without losing quality? Well, our “Most Helpful Tips & Tricks to Edit Photo Background with No Quality Loss” article will be going through a couple of methods that use in order to do so! We’re going to be introducing a step-by-step of all 4 methods, as well as a comparison at the very end. So stick around until the end and continue reading to find out more!

Following we are going to show you how to edit photo background with no quality loss online using PixStudio:
Step 1: Go to the official home page of the PixStudio website。 and click to “Start Design Now”.

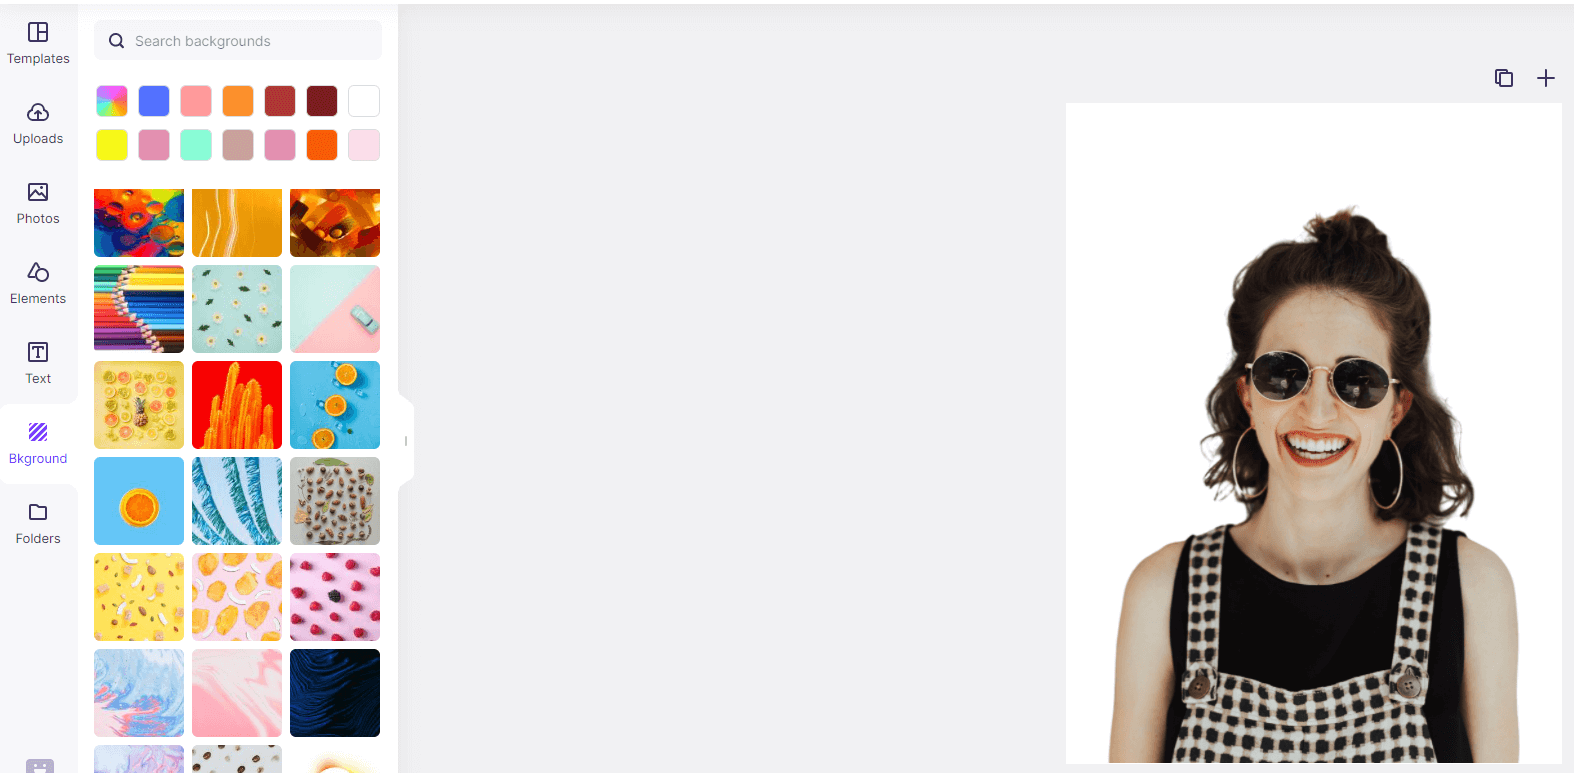
Step 2: Choose the target design you would like to have, and then upload the image that you want to change the background to white. After you’ve uploaded the image, try to click “Remove Now” to remove the background.

Step 3: Click the “Background” and you can change the background color or massive exquisite background at your will.
Step 4: You can download the photo for free and get the resulting image without quality loss.


The first editor we’re going to introduce is Wondershare Fotophire Editing Toolkit. This toolkit includes both a “Photo Editor” and a “Photo Cutter.” That means, that you’ll be able to remove the background and edit the photograph at the same time. All this without risking the quality or the integrity of the image. Here are a couple of relevant features:
You’re going to have to purchase the Fotophire Editing Toolkit in order to download the FULL version of this software. Of course, if you’re just looking to test it out or to follow along with the demonstrations, you can download the FREE trial.

The first thing you’re going to have to do is remove the background of your photograph. This can be done through the “Photo Cutter” editor. Just click the middle-box on the main hub (as highlighted in the image below.)

Launching the “Photo Cutter” will open up this menu (refer to the image below.) This is where you’ll be able to import the image that you want to edit. Just click the “Open…” text and choose your image from the pop-up.

In order to edit the background of your image without losing quality, you’re going to have to remove the unwanted background from the image first! This can be done easily enough, just use the tools under the “CUT - OUT” module. Relevant tools include:
Quality: Now, if you want to make sure that you’re retaining a high-quality image, you’re going to have to keep the quality slider up high. This will slow the automatic clipping effect, but it will make sure that there is no quality loss.
A couple of extra tools to make the job even easier are:

As for editing the background of your photo, you can do so using the “PHOTOMONTAGE” module. This will allow you to change the background easily, either by using one of the available presets or by adding your own custom background with the “+” box.

You can save your photograph without losing quality by adjusting the export options. You can do this by clicking on the “Save” icon on the top menu bar. This menu (highlighted) below will popup — adjust accordingly!

The next product that we’re going to be introducing is Adobe Photoshop. There’s no denying the kind of quality that you’re going to get with this one. After all, Photoshop is used by professional photographers, illustrators, graphics editors, etc. all around the world. Photoshop offers easy background removal and photo editing capabilities.
You’re going to have to import the image that you want to edit before you start. This can be done through the main menu page. All you have to do is click the “Open…” button on the left-hand side of the screen.

In order to delete the background of the image that you’re working with, you’re going to have to apply a transparency mask on the image. You can either click “Select” tab > “Select and Mask…” or use the keyboard shortcut Alt + Ctrl + R.
Tip: The shorthand key for this is Alt + Ctrl + R

You can’t just keep the entire mask on the image, you’re going to have to erase the parts that are covering the foreground — leaving the background under the mask.
Once you’re certain that the entire foreground is clear of the transparent mask, click “OK.”

You’re going to have to apply the mask in order to remove the background completely. To do this, right-click on the layer that you were working on and choose the “Apply Layer Mask” option.

Now, as for editing the background of your photo, you’re going to need a new layer. To do this, click on the “Create New Layer” icon in the bottom right-hand side of the screen. You can import something or create your own design using Photoshop’s drawing tools.
Either way, make sure that the new layer is underneath the old one (as shown in the image below.)

Much like Fotophire, Photoshop will give the option to save your photo with no quality loss. Just click on the “Save As…” option under the File tab and adjust the options accordingly.

The online method of editing your photo background is through a website called Clipping Magic. This is a premium background removal tool that should allow for easy photo background editing with no quality loss. However, it’s also a pay-to-use product that asks you to pay one credit per image. It’s pretty costly — $3.99 per month for 15 credits and $14.99 per month for 500 credits, but it produces high-quality images.
In order to use this program, you’re going to have to visit the Clipping Magic website. You’re going to be asked to upload your image. You can do this by dragging and dropping the image file to the specified area, or click on the blue “Pick Image to Upload” box.

There are two tools that you can use to remove the background of your image.

Adding a background using Clipping Magic is easy! Just click on the “Background” box on the bottom left-hand side of the screen. You can use this to change the color of the background of your image.

Much like the other two background editors, you can choose the kind of quality that your image is downloaded in. This ensures that you’re getting the highest quality image possible. Just click the “Download” button when you’re done.

Our last method involves a Mobile App called Background Eraser. This will allow you to remove the background of your images without losing quality. Of course, we can’t really expect much editing capabilities from a Background Eraser app. However, the App itself allows for precise photo background removal.
In order to use the Background Eraser, you’re going to have to download it for your device. This can be done for both iOS and Android devices. Just look up the name of the product or download it through this link.

The App will ask you to crop out as much of the background as possible— to make it easier to delete the background. Do so, and click the “Done” (check mark) icon on the top right-hand side of the screen.

Now you’ll get the chance to completely remove the background. The App offers a couple of tools for this:

If you notice blurriness around the edges of the image you can fix this by adjusting the sharpening effect. Choose the level of sharpness you want and click on the “Save” icon when you’re done.

Your image has been automatically saved! Just click on the “Finish” button to complete the process. You can also add a white background by clicking on the “White Background, Save as JPEG” option.

We have a total of 4 output images — one from each of the programs that we demonstrated in this tutorial. Which of these are better? Well, you can judge that for yourself! Let’s look at these side-by-side.

As you can see, there isn’t much of a difference between one program and the other. The same image had been used to test out all four programs and each one produced High-Definition images! Of course, that doesn’t mean that there aren’t any differences period.
Quality of the image aside, when we consider ease-of-use, stability, price, number of features available, etc. then the best choice is definitely the Fotophire Editing Toolkit. It’s easy to use, offers a cheap one-time payment, and has all the tools that you need to remove and edit photo backgrounds with no quality loss! That makes it the most helpful choice!
