Fotophire Editing Toolkit
Your Complete Photo Editing Toolkit
Need clean images for a project, or perhaps a storefront? Our All Methods to Change Photo Backgrounds to White article will teach you all the different ways that you can create a clean image with a fresh white background. We’ll be comparing all three methods at the very end, so continue reading to find out more!

The best way to change your photo background to white is the Wondershare PixStudio. This is a wonderful photo editor which allows you to edit stunning images even though without any professional graphic skills. You can remove the background with just one click and you can get the resulting image in seconds. And you are granted to design your photo with massive text, elements, and background.
Now we are going to show you how to change your photo background to white online easily just in few clicks with Wondershare PixStudio.
Step 1: Go to the PixStudio Website.
Go to the official home page of the PixStudio website and click to “Start Design Now”.

Step 2: Upload Photo and Remove Background
Choose the target design you would like to have, and then upload the image that you want to change the background to white. After you’ve uploaded the image, try to click “Remove Now” on the right to remove the background.

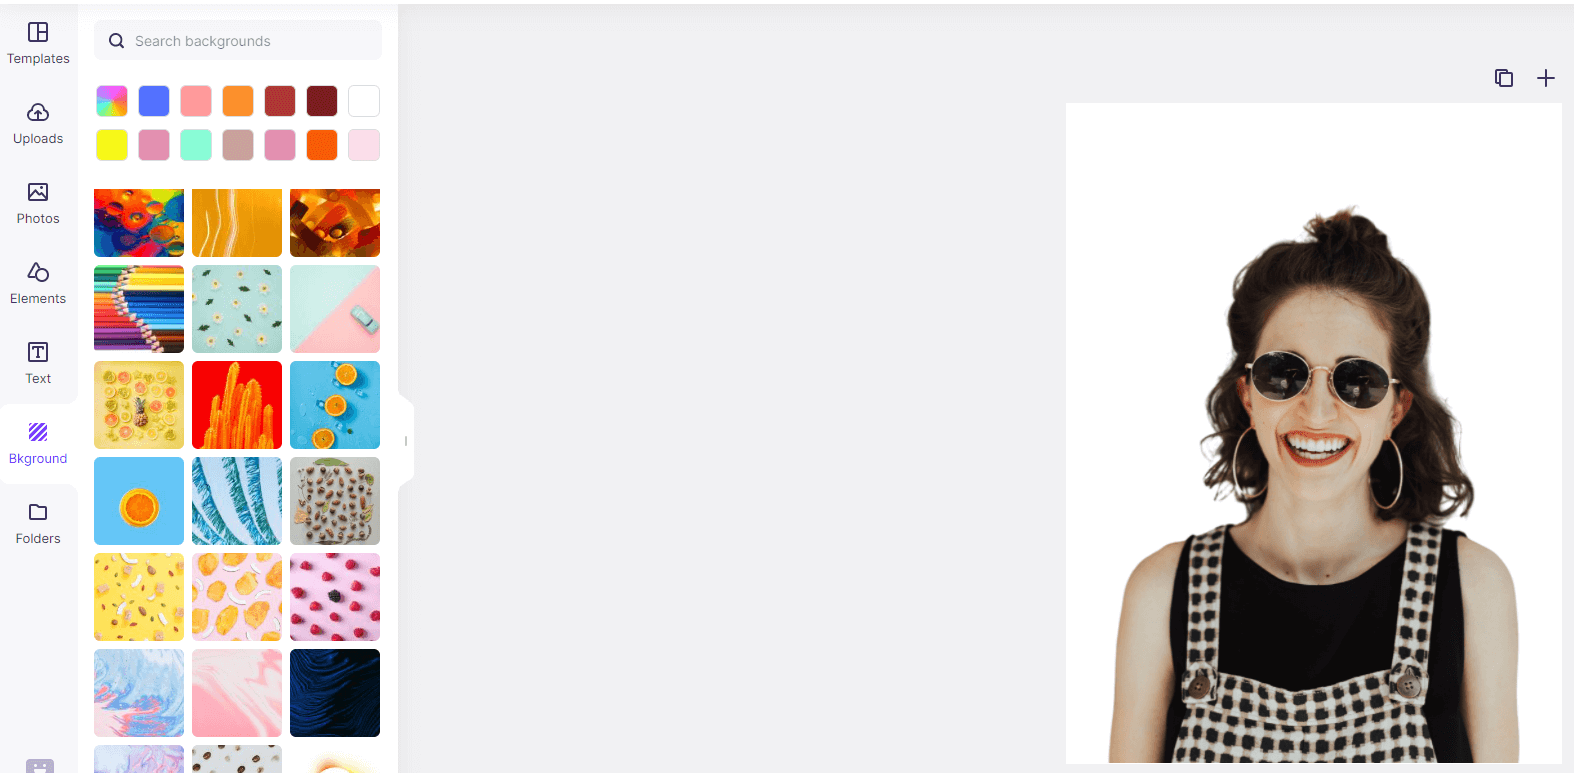
Step 3: Change Background to White
Click the “Background” and you can change the background color or massive exquisite background at your will.
Step 4: Download and Save it
You can download the photo for free and get the resulting image.


The number one method for changing your photo background to white is the Fotophire Editing Toolkit. This is a set of different graphics editors that will allow you to edit your photographs in a variety of ways. It offers an intuitive interface that is easy-to-learn and will give you the tools that you need to remove an unwanted background and replace it with a white one.

Once the Fotophire Editing Toolkit has been installed, then you can run the Photo Cutter software. Just click the middle box (highlighted in the image below.) This will allow you to change photo background to white easily.

The main menu of the Photo Cutter is where you will be asked to import your image. Press the Open… button and choose the image that you want to change the background to white.
In order to change the background of the photo to white, you’re going to have to delete the original background first! Fotophire offers this feature readily — the tools can be found under the CUT - OUT module. These tools offer specific capabilities, but most of them are pretty straightforward. For example:
Other background editing tools featured in Fotophire include:

Now that we’ve deleted the background of the image, we can now change it into white. To do this, click the PHOTOMONTAGE module. You’ll see that they have a couple of preset backgrounds available. However, if you want your own image, you can upload it using the + box (as we did in the image below.)
Once you’re done changing the photo background to white, remember to save your image! Just click on the Save icon (highlighted below.)
Tip: The only way you’ll be able to use all of its features is by purchasing the Fotophire Editing Toolkit through their website.

The next program we’re going to introduce is one that you have probably heard of before — Adobe Photoshop. This is a professional-level graphics editor that you can use to precisely change photo backgrounds to white. Of course, that’s a lot easier said than done. Adobe Photoshop is a lot harder to use than the Fotophire — on the account of its premium tools. Still, continue reading to learn how to change photo background to white with photoshop.
Click the Open… button on the main menu in order to import the image that you want to change the background of. This will automatically move you to the main editor.

The only way to change photo background to white in Photoshop is by using the Select and Mask.. option. In order to do this, click on the Select tab > Select and Mask… this will change your editor — to allow for background removal.
Tip: The keyboard shortcut for Select and Mask is Alt + Ctrl + R

Selection the previous option will automatically place a transparency mask over the entire image. All you have to do next is delete the mark on top of the foreground of the image (a.i. The parts you want to keep.) You can use the tools on the left-hand side of the screen (as highlighted in the image below) to get as detailed as possible. When you’re done isolating the background of the image, click the OK button on the bottom right-hand side of the screen.

We’re not done with the marking just yet. You’re going to have to finalize the changes by applying the mask to the layer. In order to do this, right-click on the layer that you were working on, and click on the “Apply Layer Mask” option.

Now, we can get to actually changing the background of the photo to white. This has to be done in another layer, to create a new layer — click the Create New Layer icon on the bottom right-hand side of the screen. Make sure the new layer is under the original! You can now use the bucket tool in order to paint the entire layer white or any another color that you wish.

Don’t forget to save your image! To do this, click on the File tab > Save as…

The last method that we’re going to be cover is a Mobile App called Background Eraser. This app is good for quick background editing but doesn’t really offer much else. Still, for a mobile app, it’s pretty precise.
You can download the Background Eraser app for free on your mobile phone — both iOS and Android.

Once you’ve installed the program, launch the app. It will ask you to choose the photo that you want to edit. Do so, and click “Next.”

Crop as much of the background as you can. This is limited to rectangular photo cropping. Once that’s done, click on the checkmark icon on the top right-hand side.

The app will allow you to use a target tool to pick out the parts of the image that you want to delete. Drag it around the image and release whenever you run into the background. You can change the size of the cursor using the Cursor Offset slider on the top menu bar. When you’re done deleting the background, click the checkmark “Done” icon on the top right-hand side of the screen.

Once the background has been deleted, you can smoothen and or sharpen the edges of the foreground. When you’re satisfied with the overall look, click on the Save icon on the top right-hand side of the screen.

You can finish up by clicking on the Finish button, or change photo background to white using the “White Background, Save as JPEG” option on the bottom half of the screen.

| Fotophire Editing Toolkit | Photoshop | Mobile App | |
|---|---|---|---|
| Stability |
|
|
|
| Quality |
|
|
|
| Speed |
|
|
|
| Usability |
|
|
|
As you can see from the comparison chart above, there’s an obvious winner here! Adobe Photoshop offers a lot of great features, however, when it comes down to ease-of-use it definitely falls behind. The fact that it’s so heavy with features also makes it a lot slower than the other two options. The Mobile App was good (and free), however, the ad pop-ups and the quality of the resulting image left a lot to be desired. With all that in mind, there’s no question that the Fotophire Editing Toolkit is the best way of changing your photo background to white!