How to Make a Blurry Picture Clear with 3 Helpful Ways
Have you been looking for a way to make a blurry picture clear? It’s a situation that we all are forced to face every now and then. You can have dozens of crisp pictures only to find that the perfect photo turned out to be quite blurry. So, how do we fix something like this? Fortunately, there are many different methods that we can try. This article will be introducing you to three completely unique ways that you can make a blurry picture clear — at the end, we’ll be comparing each one to see which is the best.

- Part 1. How to Make a Blurry Picture Clear with Fotophire Focus
- Part 2. How to Make a Blurry Picture Clear with Mobile App
- Part 3. How to Make a Blurry Picture Clear Online
- Part 4. Comparison Table
Part 1. How to Make a Blurry Picture Clear with Fotophire Focus
The first method that we're going to be introducing is a software called Fotophire Focus. This PC program is available for download in both Mac and Windows OS. All you have to do is get the demo version or the full version from the Wondershare Official Website. The reason why we chose Fotophire rather than other well known PC graphics editors, is because of its intuitive interface. The tools are easy to use and perfect for people who are just starting out. Here are just a couple of things that it can do to help you make a blurry picture clear.
- Fix blurry photos in one click.
- Re-focus photos easily
- Apply more than 200 effects to your photos.
- 1-click sharpen tool to help you make photos better.
Key Features of Fotophire Focus
- Make a blurry photo clear with one click, using the Sharpen Tool.
- Adjust the enhancement using the amount and radius sliders under SHARPENING.
- Enhance the overall image using the sliders under the ADJUSTMENTS menu.
- Keep an eye on your progress with Before and After shots
- Work with an easy to use drag and drop interface that makes the editing process quick but powerful.
How to Make a Blurry Picture Clear with Fotophire Focus
Step 1: Launch Fotophire Focus
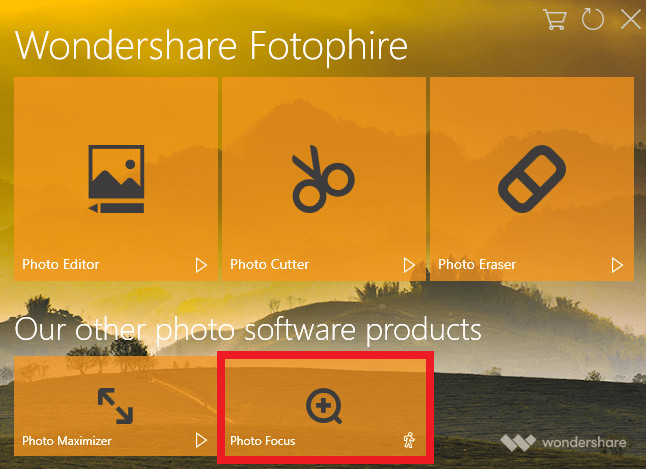
The first thing that you'll have to do to get the process started is to launch the Fotophire Focus editor. To do this, make sure that you have at least the demo version of the product installed. Once that's done, double click on the desktop shortcut until the welcome hub opens (refer to image below.) Pick the box titled Photo Focus to have access to the tools to make a blurry picture clear.
Step 2: Open Image
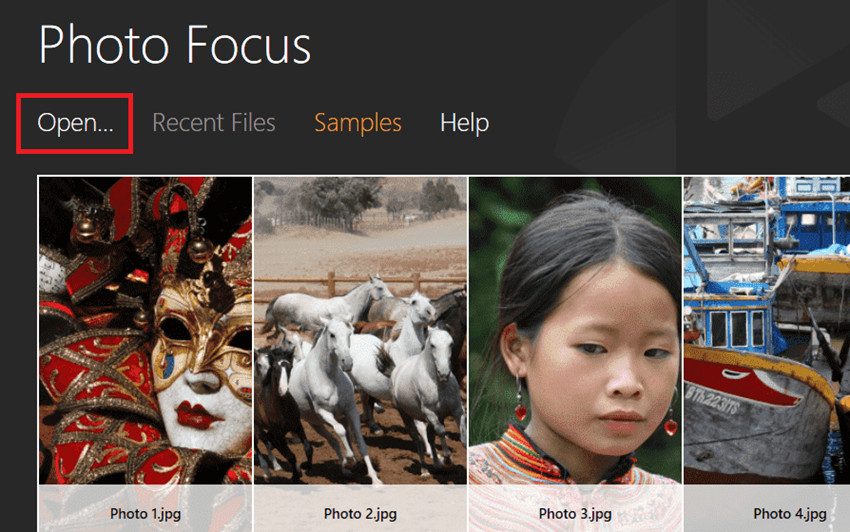
Opening your image (in other words — importing your image) into the Fotophire focus editor is easy. Wait for the main hub to open and click the Open… text in the top left-hand corner. All you have to do next is locate the blurry image you want to make clear.
Step 3: Make Blurry Picture Clear with One Click
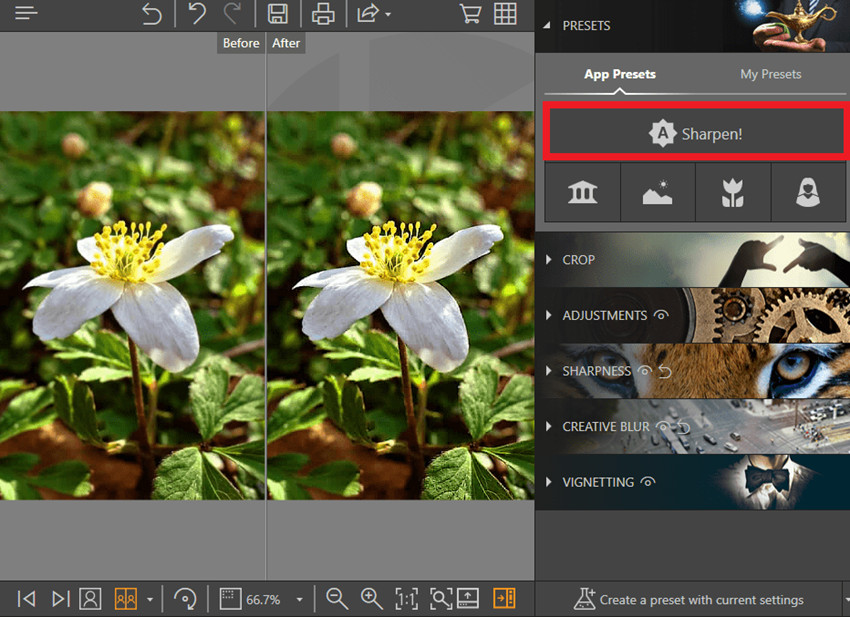
The first tool that we’re going to use is the one-click sharpen tool. This tool is located under the PRESETS menu. All you have to do is click on the Sharpen! button (as shown below) to automatically make your blurry picture clear.
Step 4: SHARPNESS
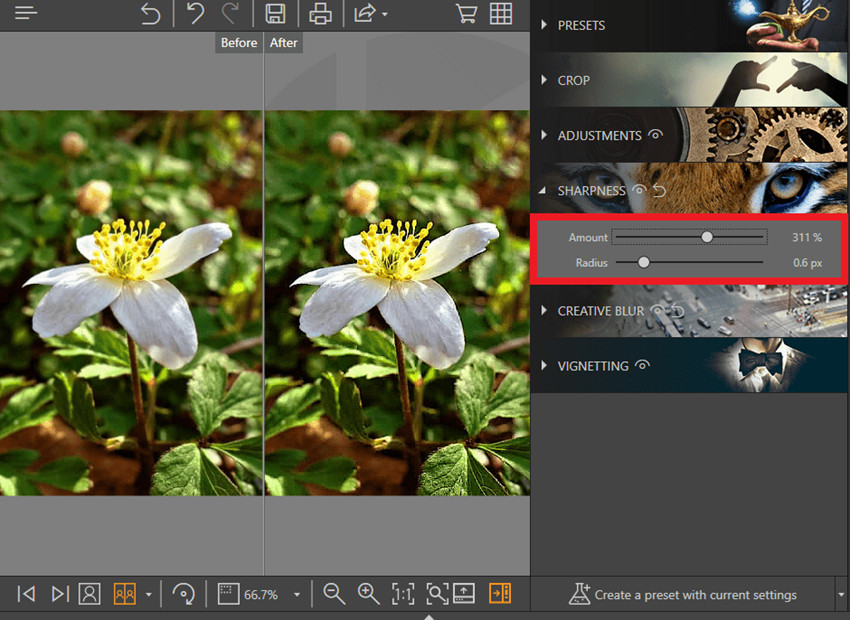
Technically, you should be done at this point. However, you can always further enhance your image by adjusting it through the SHARPNESS menu. There are two tools under this menu, they are:
- Amount: This is in charge of providing the overall enhancement. The higher it is, the sharper your image will become.
- Radius: The radius slider is for adjusting the size of the pixels. The higher the number is, the more prominent the pixels will be.
Step 5: ADJUSTMENTS
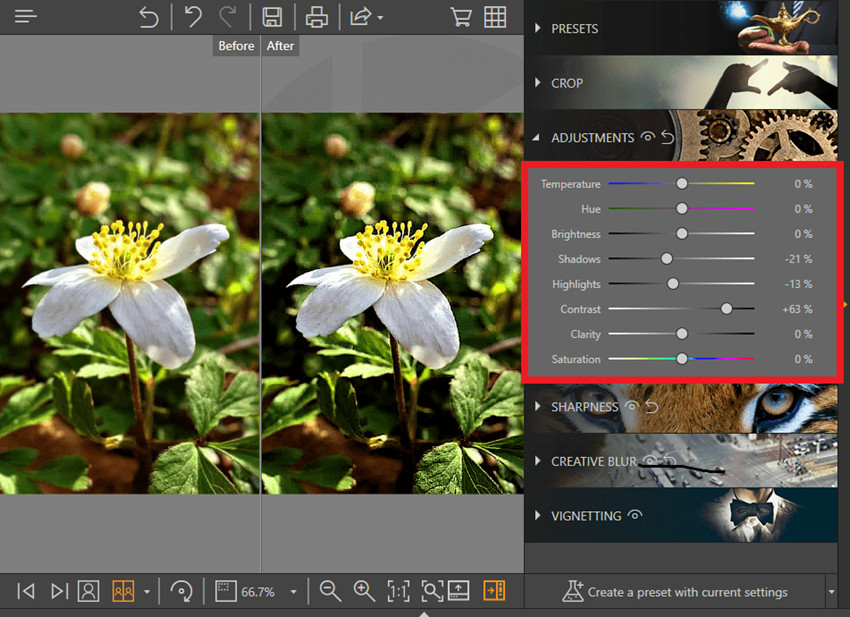
The next step is completely optional, but it will help give your image that professional finished-look. Locate the ADJUSTMENTS menu, and play with the settings for the sliders. Try to adjust the contrast, shadows, highlight, and brightness to make the focus of your image pop.
Step 6: Save Changes
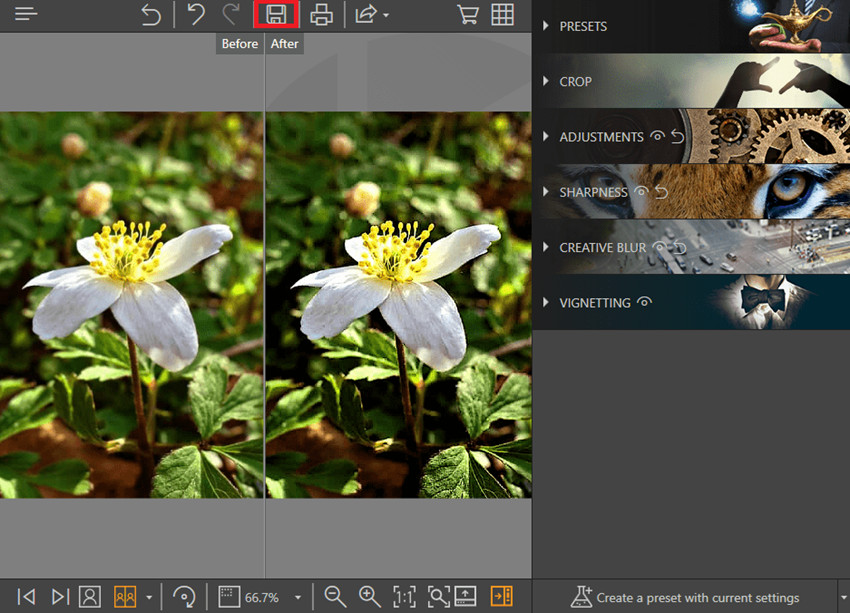
Just a friendly reminder! Make sure that you save your image before exiting the window. The save icon can be found in the middle of the top menu bar (as highlighted below).
Part 2. How to Make a Blurry Picture Clear with Mobile App
The next method that we’ll be introducing to help you make a blurry picture clear is a mobile application. Specifically, we're going to be demo-ing the app called Photoshop Express. This mini Adobe Photoshop editor is a much more intuitive version of the regular Photoshop CC. The features are much more limited too, but it works just the same!
How to Make a Blurry Picture Clear with Mobile App
Step 1: Launch Adobe Photoshop Express
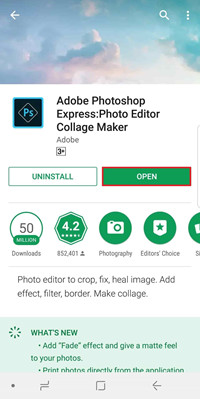
The first step is simple, just download the app from your App Store or Play Store. If you don't want to risk downloading one of the fake versions (because there always are), click this link here. When you're done, just press the OPEN button on the download page or the app shortcut on your Phone's home screen.
Step 2: Magic Wand Tool
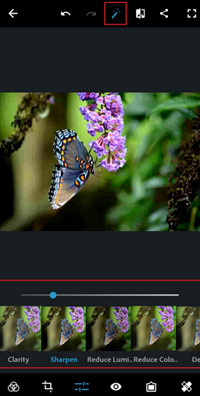
The app features a magic wand tool that will automatically make a blurry photo clear. This wand can be located on the top menu toolbar (as highlighted below.) However, you can also make use of the sliders on the bottom of the screen to adjust the enhancement.
Part 3. How to Make a Blurry Picture Clear Online
The next, and final, method that we're looking into is the online method. We decided to go with the PixStudio online editor for this one. The product is free, but they do offer more features when you pay for a monthly premium membership.
How to Make a Blurry Picture Clear Online
Step 1: PixStudio Online Editor Website
Go to the PixStudio website and choose the target design.

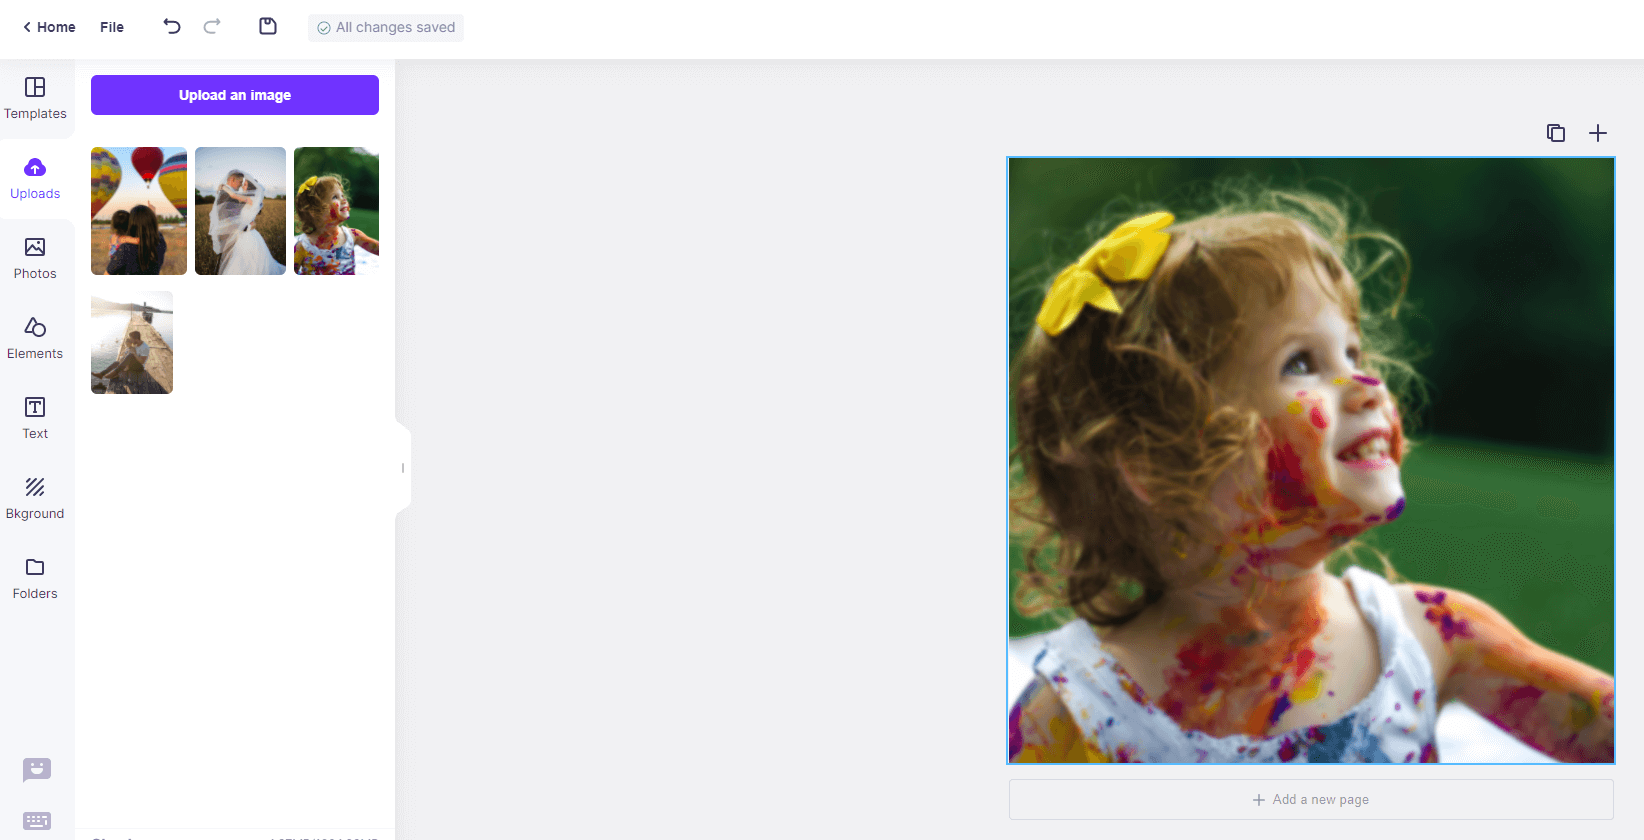
Step 2: Import image into the PixStudio
Upload your blurry picture that you want to make it clear.
Step 3: Make Blurry Picture Clear
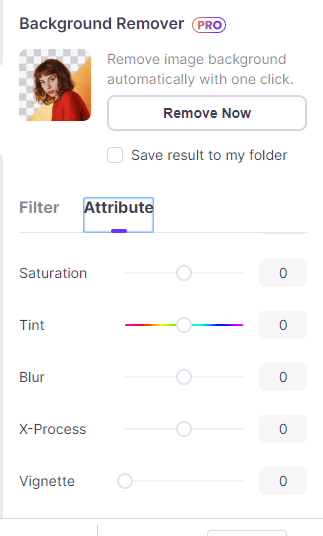
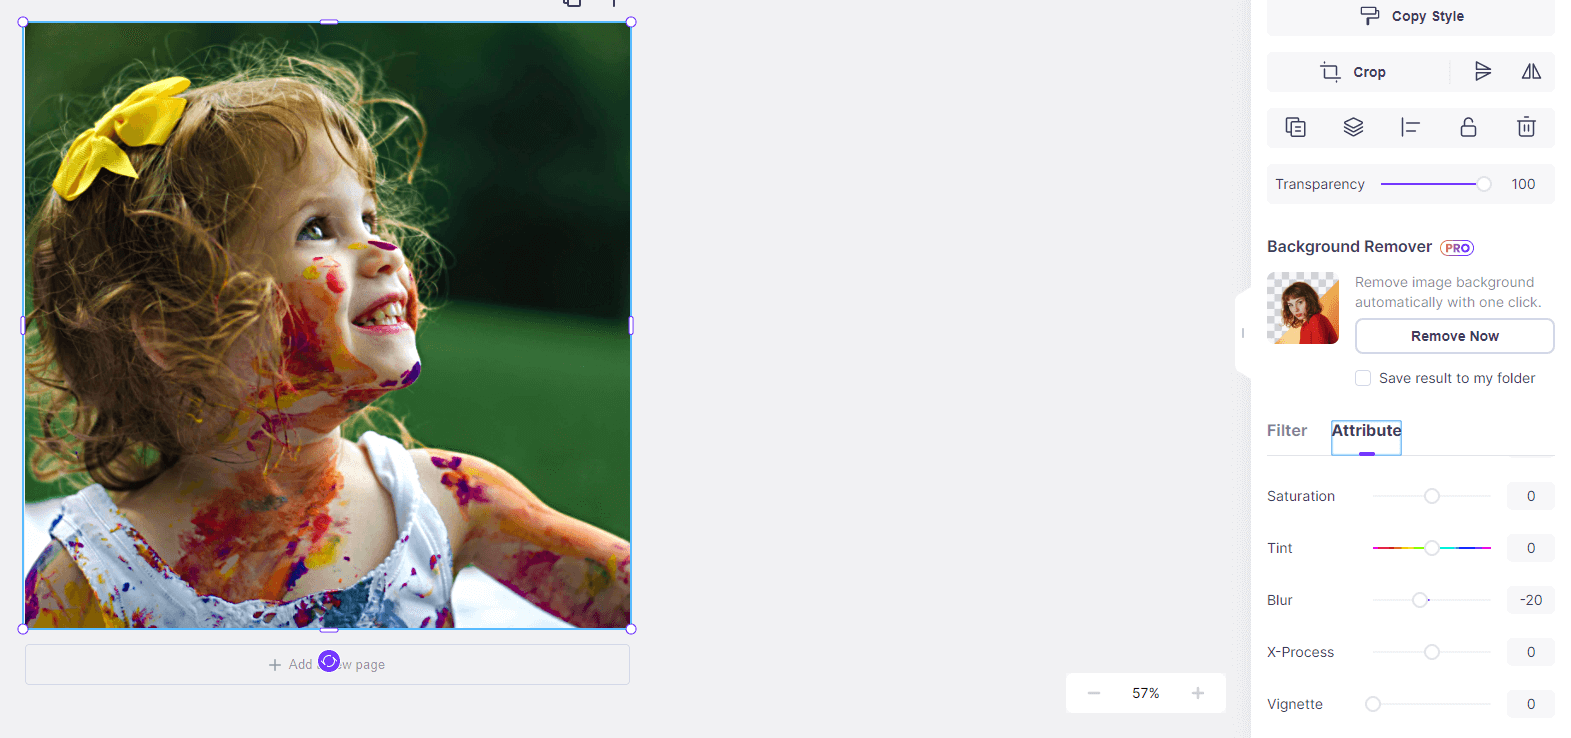
Select the picture, choose “Attribute” and you can see “Blur”. And try to drag the “Blur” buttom to the left, and you will find your picture become much more clear.
Step 4: Save
After fixing your picture, you also can try to edit your photo, if you tried not to edit your image, you can download your resulting image for free.

Part 4. Comparison Table
| Name | Fotophire Focus | Photoshop Express | PixStudio |
|---|---|---|---|
| Stability | Very Stable | Stable | Depends on Network |
| Quality of Output | High | Normal | High |
| Speed of the Process | Fast | Normal | Fast |
| Ease of Use | Easy to use | Average | Easy to use |
Conclusion:
As you can see, there are big differences between the methods demonstrated above. Those differences allowed us to find a clear cut winner. The App method was easy to use. However, it was a little slow when it came to enhancing high-resolution images. The App also ended up costing quality once the image was enhanced. As for the Online method, it took a little while longer to enhance the image, and even then — it didn't look so great. In conclusion, the Fotophire was definitely the best choice. Not only was program easy and quick, but it also provided the crystal clear image that I wanted. There's no room for arguments here. The Fotophire wins.

