Fotophire Editing Toolkit
Your Complete Photo Editing Toolkit
A picture doesn’t always come out crystal clear. Even just the slightest bit of movement from the camera can create a blur effect that draws away from what should have been a crisp image. Sometimes, this movement can manifest on the subject of the photograph itself - like a wind that blows at the leaves of a tree or a twitch from a human subject. Either way, it’s nice to be able to enhance an image after the fact. In our How to Fix Blurry Pictures with All Methods article, we’re going to be introducing the different types of programs that you can use to enhance your photographs!
The first method we’re going to be introducing to you is the program called Fotophire Focus. This is an editing program that is available for both the Windows and Mac. It offers an intuitive interface that is easy to use and displays various of editing features that would rival that of professional graphic editors like Adobe Photoshop. The following is a list of features that are relevant in demonstrating how to fix blurry pictures with Fotophire Focus:
First, you’re going to have to download the demo-version or purchase the Fotophire Focus through their official website. A one-time payment is required for the full license. However, you can test out the product for free by downloading the demo-version. Once the product has been launched, click the “Photo Focus” editor and move on to the next step.

Second step, import the image that you want to edit. To do this, click “Open…” and locate the image file through the Windows popup.
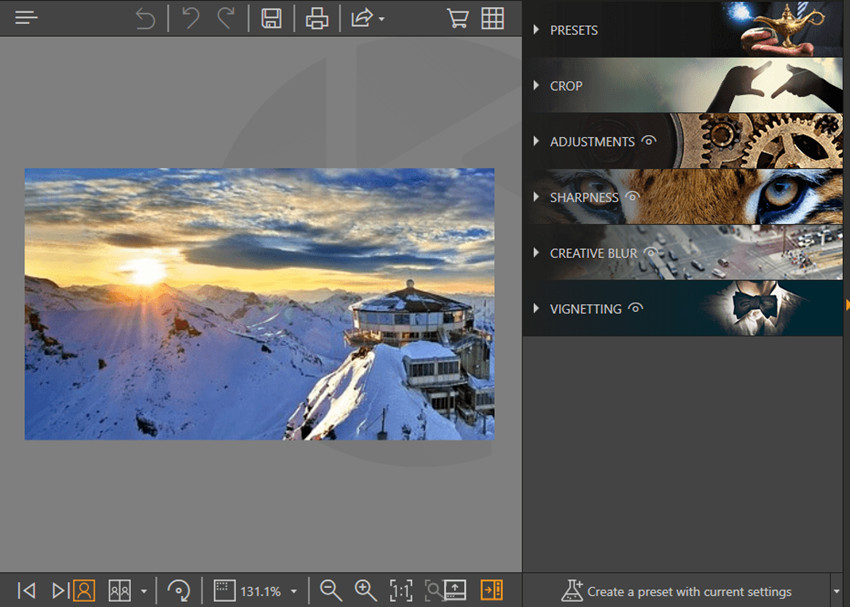
The next step involves the one-click sharpen tool that we had mentioned previously. Click on the “PRESETS” drop-down menu and click the “Sharpen!” box under App Presets. This will automatically fix the blurry photo (as shown below).

If you’re unhappy with the automatic enhancement, then you can adjust it using the aforementioned sharpness sliders. You can find these tools under the “SHARPNESS” drop-down menu. There are two ways that you can adjust the enhancement:

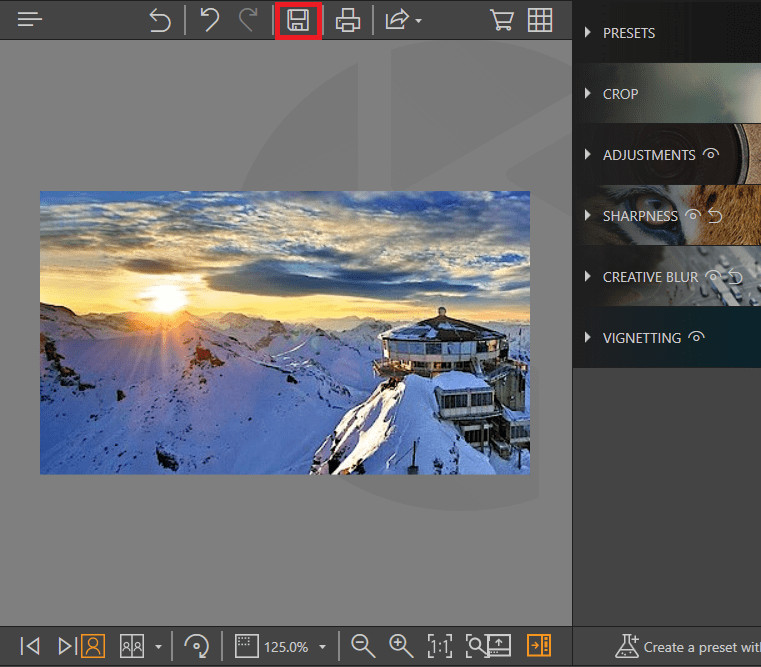
Finally, the last step is to SAVE the file. You can do this by clicking on the SAVE logo in the middle of the main toolbar (as shown in the image below).
The second method that we will be introducing is Adobe Photoshop. You’ve no doubt heard about this one. It’s the graphics editor that many professional-level photographers have grown to love and learn - usually after years of taking classes. It’s not something that just anyone will be able to use, however, we managed to condense the steps to give you an idea of how to fix blurry pictures in photoshop.
Much like the previous program, our demonstration begins by downloading and installing Adobe Photoshop. Be warned, this process might take a couple of hours, perhaps even an entire day - depending on the speed of your PC and your internet. Adobe offers a free 7-day trial after signing up for a Creative Cloud account through their official website.

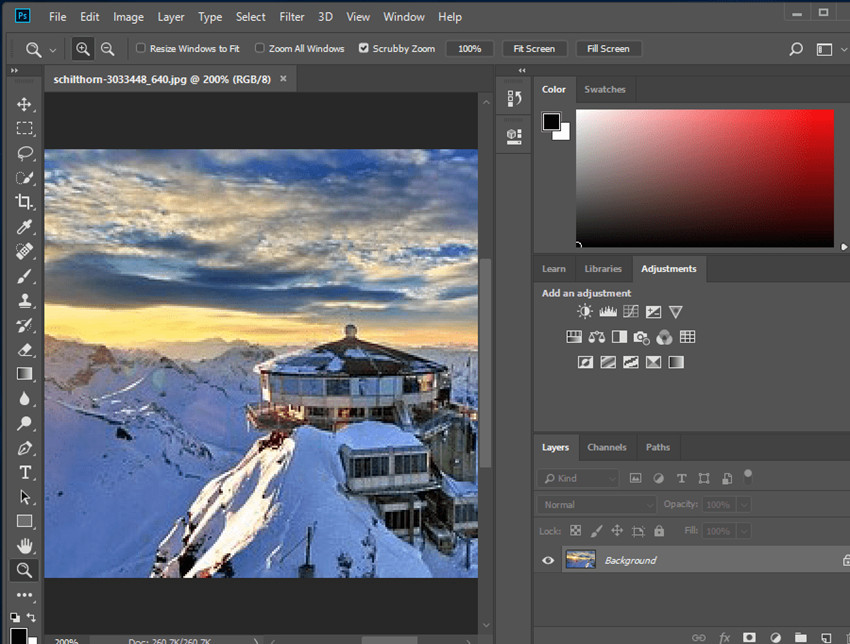
The next step involves the importation of the image. You can do this by clicking “Open…” on the main screen and locating the blurry picture that you want to fix.
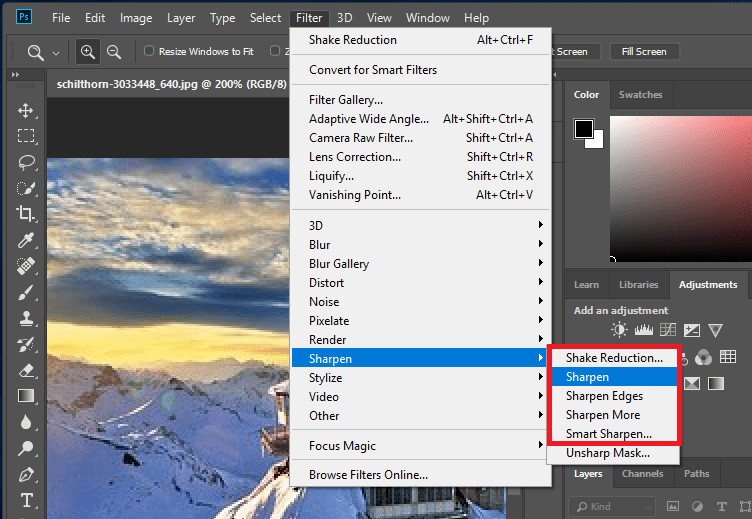
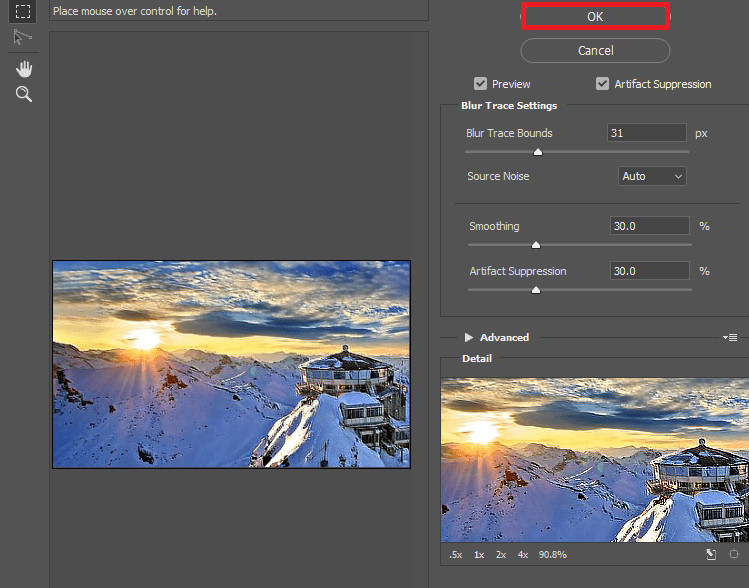
In order to fix blurry photographs, you’re going to have to apply a filter. You can do this by clicking on the “Filter” tab on the top menu. If you look through the drop down menu you can find both Sharpen > Shake Reduction… (as shown in the image below). Wait for a few seconds. The program will automatically enhance your photograph, and lead you to another editor.
As you can see from the preview, the image has been automatically enhanced. You can further fix blurry pictures with photoshop by using the sliders. When you’re happy with the enhance, click “OK.”
When you’re finished fixing your blurry photo, remember to save! You can do so by clicking on the “File” tab. The “Save…” option will be on the drop-down menu. Extra Tip: You can also use the short-key Ctrl + S to automatically save your photograph.

Now, if you’re looking for quick Mac solutions, then you don’t have to look very far. The Photos App in Mac is a pre-installed software that is able to provide automatic enhancement. Unlike the previous two, you won’t be able to make finicky adjustments on this one. It can only provide a preset enhancement.
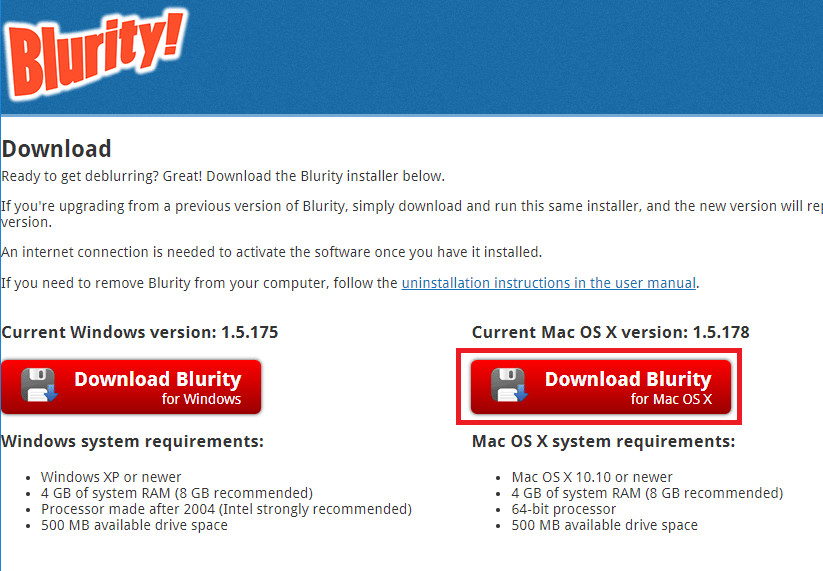
First, you’re going to have to launch the Blurity software. In order to do this, you can download their demo version from their website, or pay the one-time payment for the full license.
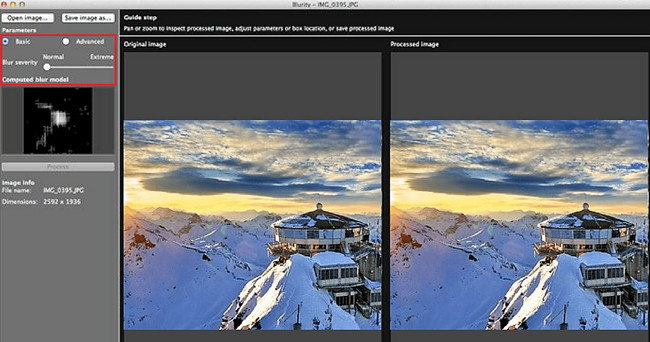
In order to begin the process, you’re going to have to import the image. To do this, all you have to do is click the “Open Image…” button and wait for the image to process. Once that’s done, you can choose either a “Basic” or “Advanced” enhancement.
Blur Severity: Adjusting this slider will increase or decrease the sharpening effect of the end result.
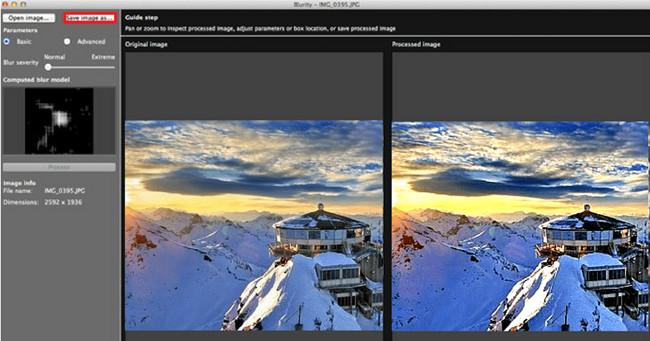
Once you are happy with the enhancement, you can save the image by clicking the “Save Image as…” button.
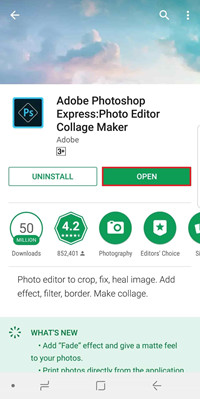
We’re going to cover how to fix blurry photos on Mobile. To do this, we’re going to use the Adobe Photoshop Express: Photo Editor as an example. This application is available in both IOS and Android devices, and is a simplistic version of it’s Adobe Photoshop for PC counterpart.
In order to launch the app, you’re going to have to download it. You can do so by looking it up on your Google Play Store or App Store, or by clicking this link.
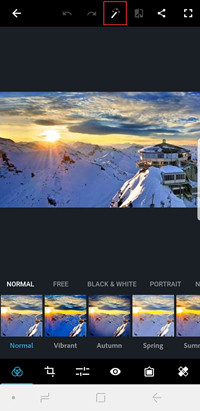
In order to automatically fix blurry photos with this mobile app, you can click the magic wand tool (highlighted red in the image below).
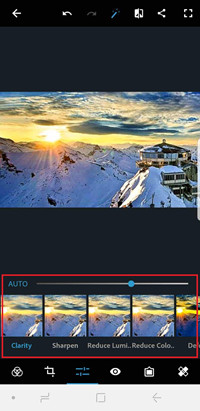
This enhancement is automatic, but not final. You can adjust the quality of the image further by playing around with the settings available.
Although two methods might seem plenty already, we’re going to go even further by introducing you to an online method. So, how does one fix blurry pictures online? It’s a lot simpler than one would think. One example is the use of a website called Wondershare PixStudio.
Step 1: Go to the PixStudio website and choose the target design.

Step 2: Upload your blurry picture that you want to fix.

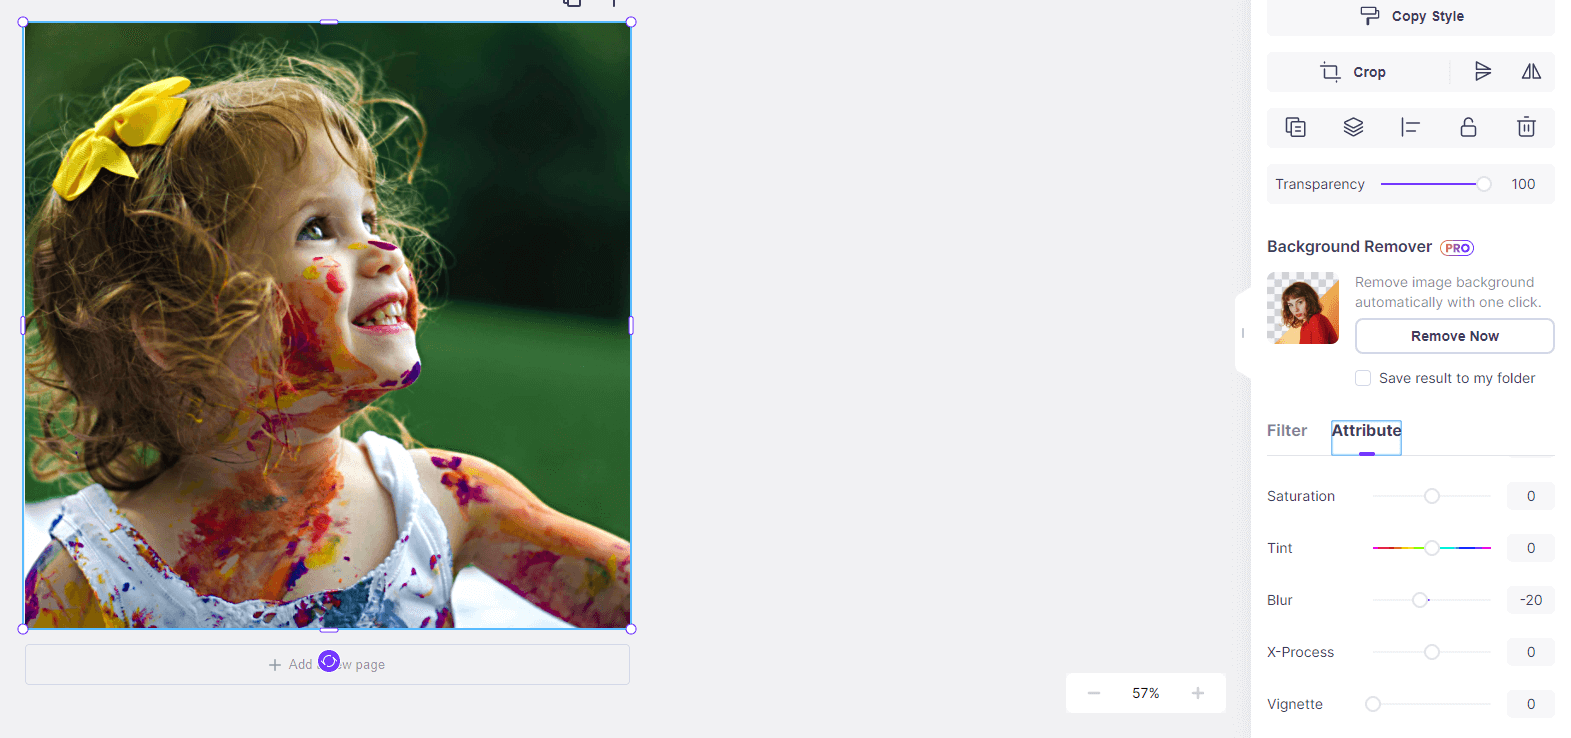
Step 3: Select the picture, choose “Attribute” and you can see “Blur”.
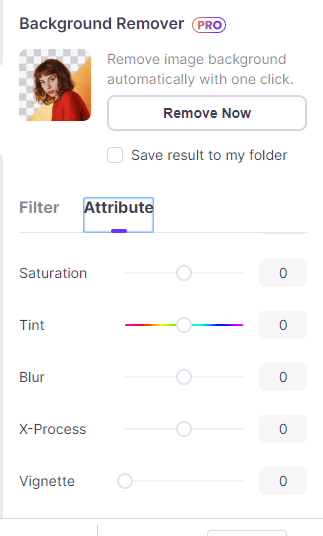
Step 4: Drag the “Blur” buttom to the left, and you will find your picture become much more clear.
Step 5: After fixing your picture, you also can try to edit your photo, if you tried not to edit your image, you can download your resulting image for free.

Ultimately, there are many methods that you can use to fix blurry pictures. However, by far, the best one would have to be the Fotophire Focus. Not only will it allow you to enhance your image with a single click, but you can also adjust it with the other editing tools that it has to offer. In the end, its easy-to-use interface and the variety that it offers makes it the most helpful solution.