Fotophire Editing Toolkit
Your Complete Photo Editing Toolkit
If you are an Instagram user you might be aware of the fact that it does not allow users to share photos from a computer. Even if you log in to your Instagram account by opening Instagram.com on your PC, it will show you the likes and feed comments on images posted by other users; however, you cannot add your photos directly. If you want to share photos on Instagram, you have to first move them to your phone and then only you can share them via the Instagram app. But the fact is that we have spent lots of time to edit our images on the computer then moving them to phone for sharing is an annoying idea. Don’t worry! There are few secret tricks to post photos to Instagram directly from your computer.
Here we are going to discuss three simple methods to share photos to Instagram from the computer. Each technique has its individual pros and cons so you can choose anyone after reading the details below.
One hidden secret is that many desktop browsers have a feature that can fool the Instagram site like you are accessing it on a mobile platform. It means your photo posting abilities can be activated instantly from the browser as well. The biggest benefit of using this technique is that users need not to make investments on additional plugins or third party apps. But the disadvantage is that only limited Instagram features can be activated through this website based access.
Step 1: While posting photos on Instagram using Chrome, start by pressing CTRL+SHIFT+I and it will open the developer tools frame on screen. You can also find this frame by simply moving to the More Tools option and then hitting Developer Tools option.
Step 2: Now press CTRL+SHIFT+M or just hit the device icon available on the screen. It will immediately add a small toolbar below the main browser toolbars. Now you can choose the desired mobile device to stimulate the system.
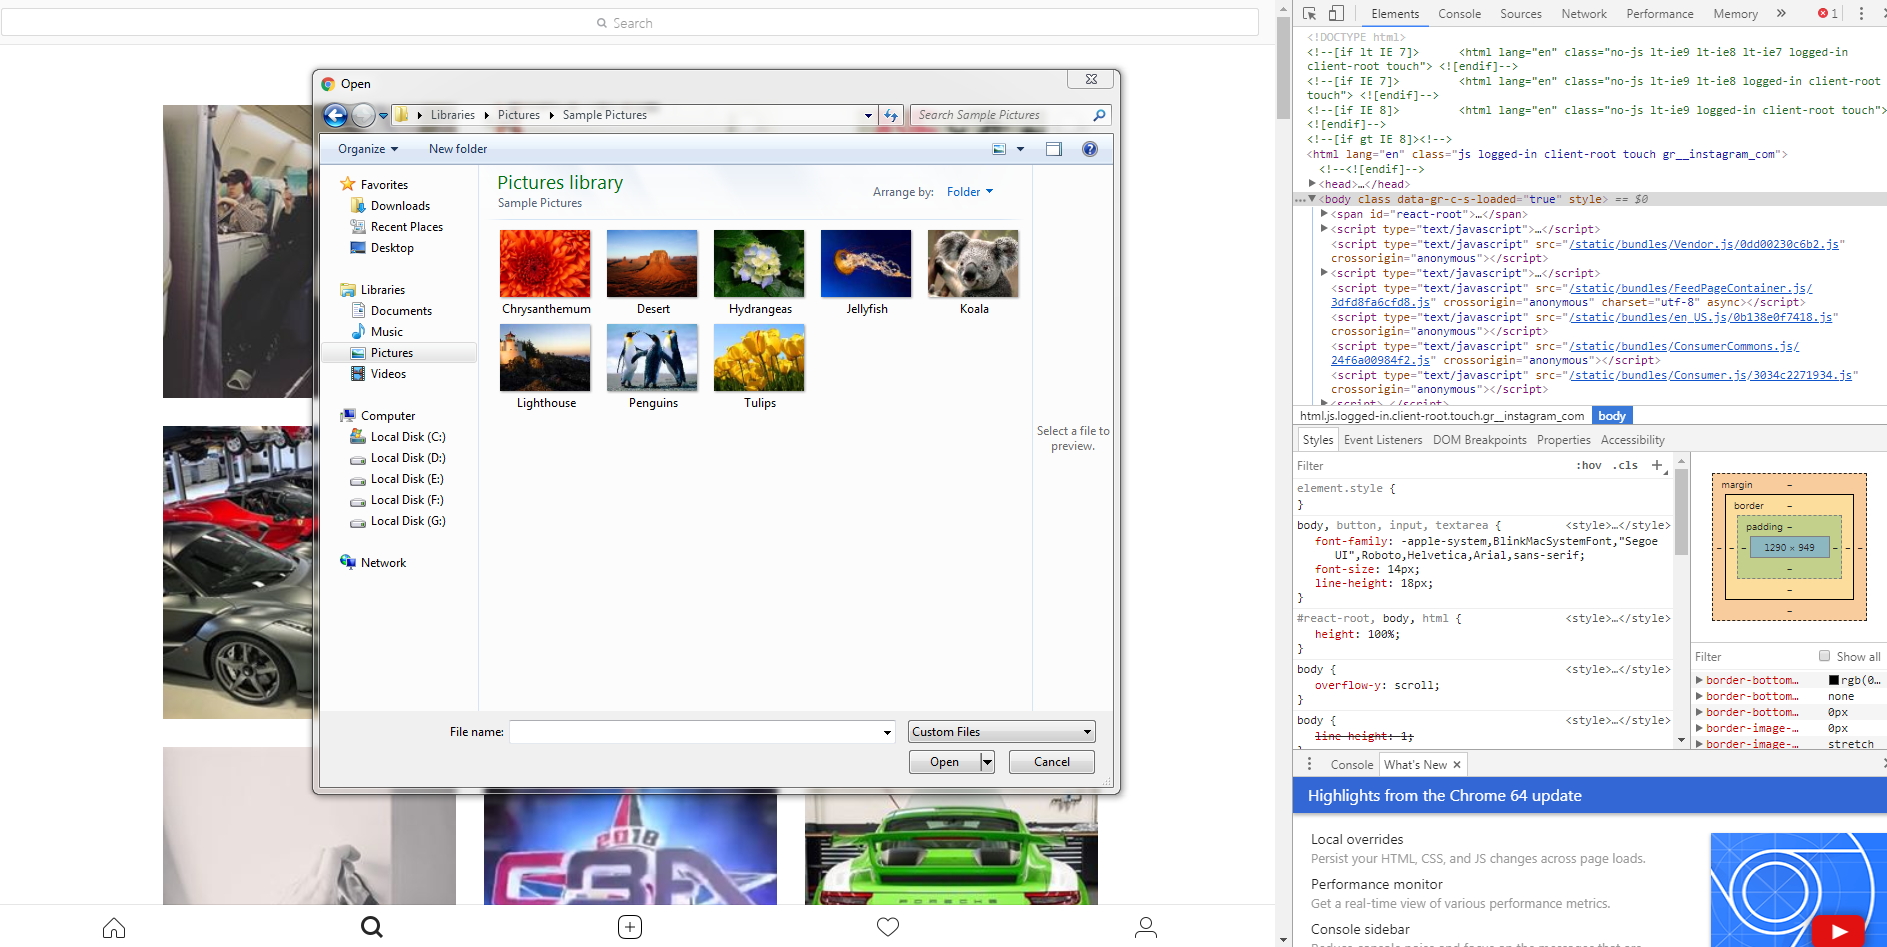
Image source: Internet
Step 3: You will be switched to a mobile browser interface where the camera button allows users to choose their images to post on Instagram. Note that, this interface will not provide you scrollbars rather you can use a round dot to stimulate the tapping and start dragging on the touchscreen.
In case if buttons are not visible on screen, prefer to hit the reload option. Also, you have to choose All Files in the browser dialog filter to choose an image for uploading.
Step 1: If you are using Safari, it will be much easier to post Photos on Instagram. Simply go to Safari and hit the “Preferences” option then go to “Advanced” mode. You will find a box at bottom of the drop-down menu saying “Show Develop Menu in Menu Bar”. Checkbox it.
Step 2: Now open the private browsing window and go to Develop option. Then choose “User Agent” and then “Safari”. Now make a selection for “iOS 10” and then switch to “iPhone”. Now open Instagram.com and sign in. Hit the camera button available on the bottom of the screen and start uploading your favorite images.
It is also possible to post images on Instagram using FireFox but the only condition is that you need to use version 52 or higher than that. In order to start posting your images, first of all, go to the “Tools” and then choose “Web Developer”. Now choose “Responsive Design Mode”.
In few cases the browser does not show the option to change devices; it happens when the Multiprocess Window is disabled. It can be disabled by any app so in order to start posting, you have to enable it first. Once it is activated, you can post images same as chrome but the added benefit is that it allows the use of scrollbars.
You are allowed to post photos on Instagram much easier than any other way. It provides massive porcelain Instagram Post which is fixed-sized, and what you need to do is to try your best to design your Instagram post.
Step 1: Go to the official website of Wondershare PixStudio, click " Start Design now " and choose "Instagram Post".

Recently in October 2016, Instagram added its app version to the Windows Store so that it can be used on Tablets as well. It can be easily installed on Window 10 computers as well but in order to enable photo and video uploading feature, it requires a PC with touchscreen function and backward facing the camera.
Those who have touchscreen window 10 PC, Instagram allows them to post, edit and upload photos same as that of Instagram Mobile App. They can complete the task by simply hitting the “Camera” icon available on the menu section and then choose whether you want to capture a new video or photo upload or you want to select it from Gallery. Once you have finalized your images, hit “next” button and it will take you to the editing window. Make desired changes to your photo by using simple editing tools and finally share your image on Instagram. That’s all!
You may also like: Best 6 Photo Editors for Windows 10 other than PhotoshopThere are few apps to complete the photo posting task but in order to establish a connection with your Instagram account directly from your computer, they need your login details. After trying so many apps to post photos on Instagram, I would love to recommend these five as best solutions because they offer a user-friendly interface and can be accessed without any consequences. However, it is always important to be careful while sharing your details with any third party app. You can try user-agent spoofing method to stay safe as it will not allow third-party apps to access your login information.
If you are working on Mac, Uplet is one of the simplest choices to get the job done. It does not demand more space in your storage and work as advertised. Users simply need to drop their images on its drop panel and hit the send button to upload them. It allows users to post multiple videos and photos at once. However, this app lacks in filter collection and you should not even expect high-end editing features but the simplistic design makes it the best choice for users. Uplet is recently updated with a new feature that allows users to access multiple Instagram accounts at once. If you are looking for a straightforward solution to post images to Instagram, Uplet can serve you better.

Image source: Internet
Gamblr is little complicated as compared to Uplet but provide the benefit of having lots of creative features. The basic versions of this app are available for free and can be accessed on Window and Mac as well. This app comes in two parts where one is installed to the computer and other is a simple web service. They work in coherence to help users to post their images on Instagram. The desktop part actually works on background, just like a utility app otherwise all the interactions happen on the web service. This app features lots of advanced editing tools including advanced filters, stickers, frames, red-eye correction tools and text overlays.
This app also supports both Mac and PC users. You can start working on the free version works like an Instagram Viewer. That means you cannot post images but can view those posted by others and can also update comments or send likes. However, if you want to post your own images, you have to move to the Pro Version of the app that is available with the monthly payment of $2.99 only. Note that, it is also limited to photo uploads only, you cannot upload videos and it not even support batch processing or scheduling feature like Gamblr.

Image source: Internet
Here is another useful app to upload pictures on Instagram. InstaPic works perfectly on Windows RT and Windows 8. To start uploading photos with this app, simply login using your Instagram account details. Soon you will find the camera icon on the top right corner of the screen. Use it to select photos from your collection or select Capture option to click a new one. This app also allows users to edit, crop and add effects to photos before posting them online. This app is suitable for all those people who need basic photo posting features to stay connected to Instagram from their desktop systems. You can access this app for free.

Image source: Internet
This Instagram app is designed with the interactive user interface and it can be used on desktop computers with the help of Android emulator BlueStacks App Player. It supports Mac as well as PC platform. You can download this app from the store and get it installed on your system. Wait for a while; once the app starts its engine you will get a tutorial on how to use this app. If you don’t need it, simply close it from the cross button available on a top right portion of the screen. Now choose your desired language and hit the arrow button. Use the Instagram account to log in and soon you will be able to post images online.
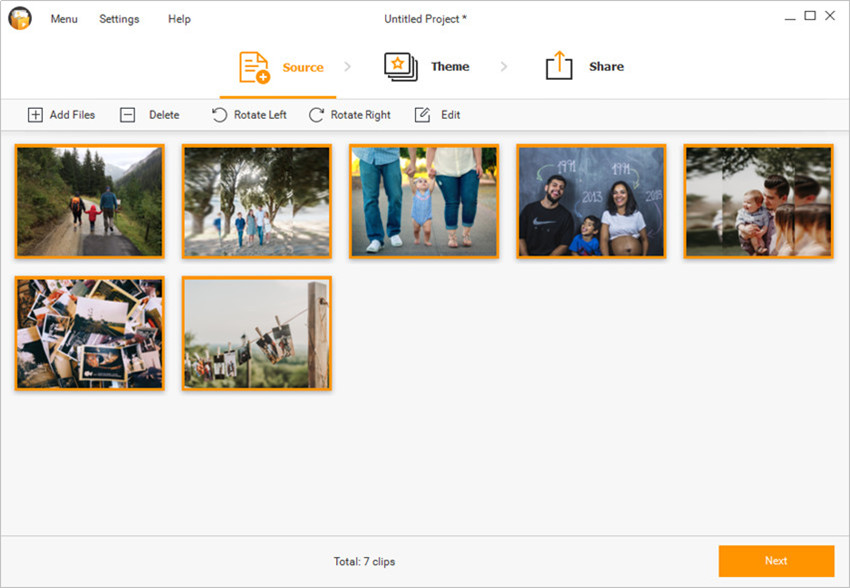
Posting a bunch of photos to instagram from computer is not an easy task, but you can collect the photos and make a photo slideshow, then post it to Instagram, and it'll be easier to do. Fotophire Slideshow Maker is an easy-to-use yet powerful slideshow maker program, and it can help users to make slideshows with photos and videos in 3 simple steps. In this part, we'll introduce how to make a photo slideshow with Fotophire Slideshow Maker in detail.

Start Fotophire Slideshow Maker after the installation, and you can add photos to the program window with following ways: Drag and drop the photos into program window; Click + button in the center of the program window to add photos; Or click Add Files > Add Photos or Videos to add photos from your computer.
After adding the photos into the program window, you'll be able to select a theme for your slideshow. The program provides 26 templates for you to choose, and it divides the templates into 6 categories, including Popular, Family, Kids, Memory, Holiday, and Birthday.

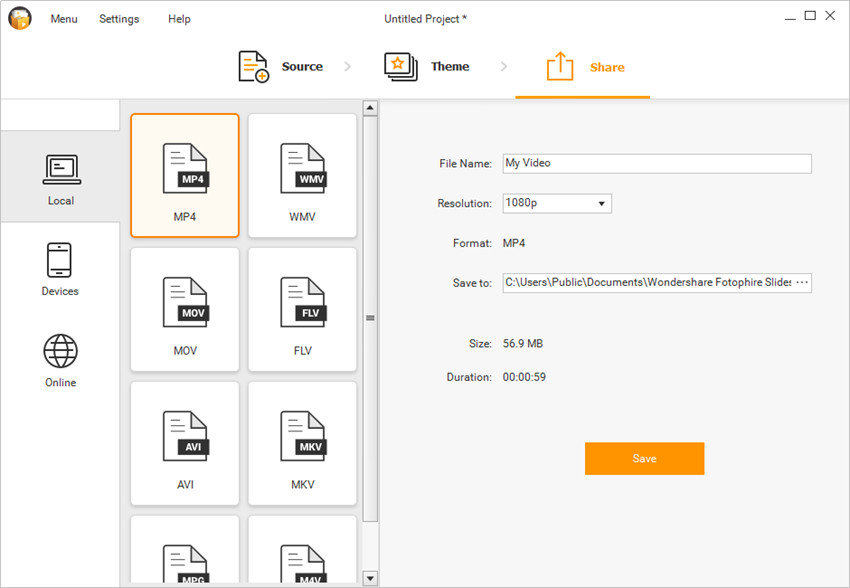
When you've finished selecting the template, you can click the Share button at the top middle of the main interface, or Next button at the lower-right bottom to enter the Save or Share section. You can select a video format for the output, and choose a folder to save your slideshow. If you want to share the slideshow to YouTube, you can go to Online section, and sign in your YouTube account to share your slideshow to YouTube.
That's how Fotophire Slideshow Maker helps you to make a photo slideshow. After creating your own slideshow, you can easily post it from computer to Instagram.